

Is there an easy design to build a bike shelter in the garden? Yes, with our plan and step-by-step simple construction guide, you can build this handsome shelter in very quick time.
Give your bikes a longer life. In this airy shelter, they are beautifully dry and ready to ride at any time. The space is enough for the fleet of the whole family’s bikes!
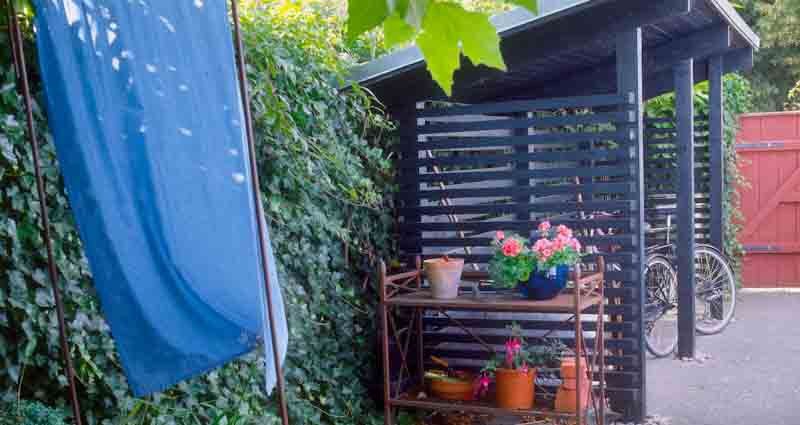
Right next to the entrance, between the garden gate and the front door,the bicycle shelter is just right. Here the bikes are always parked anyway. What is new is that the car park now has roof and walls.
The back is facing the main wind direction, so that heavy rain does not hit the wheels. The wide roof overlooking also protects, and when it gets wet inside, the wind dries, which can swipe through the groin walls.
Colour is perfectly suited to the simple bicycle shelter. Here it is slate blue, the favorite color of the garden owners:In a slightly lighter tone, the house facade was painted and in the beds also blue dominates in all types. The right tone is rarely ready to buy. But most of the paints suitable for outdoor wood can be mixed with each other, and so almost any favorite color is possible.
Materials to build a bike shelter
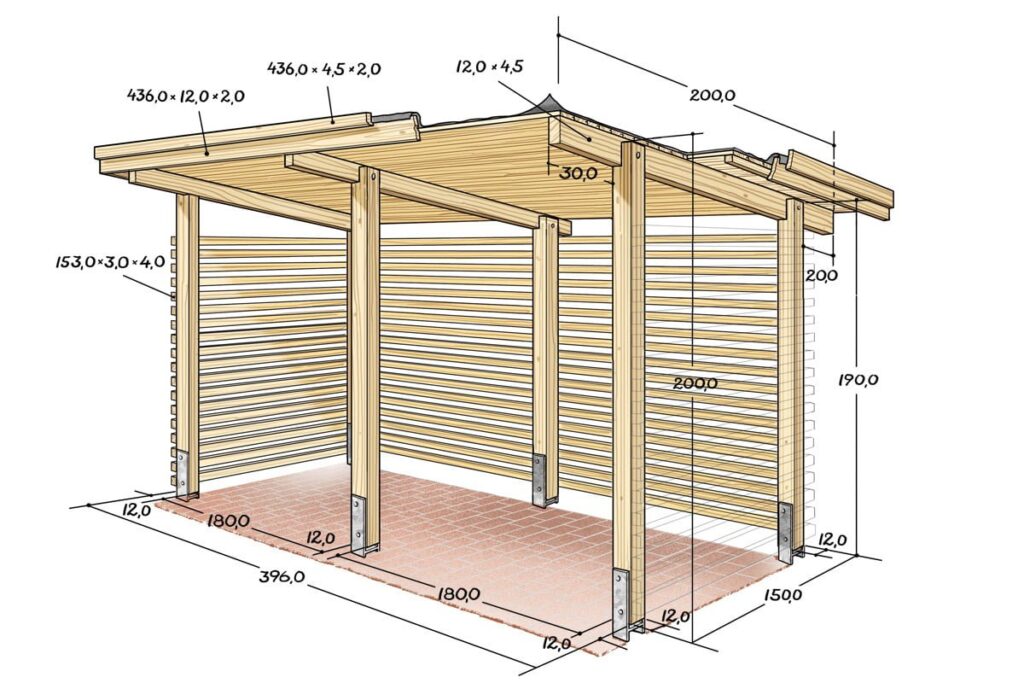
To build, you need six posts plus post anchors, three beams, rough and tar board or corrugated panels to cover the roof surface, along with boards all around and strips for the walls.
Sketch to build a bike shelter
Step 1/5: Concrete anchors

Select the post positions and concrete the anchors. The under-pushed board holds the anchor at the correct height until the concrete is cured.
Step 2/5: Align posts

The posts are aligned and fixed with screw clamps, then screwed.
Step 3/5: Mark beams

The beams should be inserted into the posts. To record where they need to be unlinked, you first fix a bar to two posts on a trial basis.
Step 4/5: Work out wood

Loosen the post, set several parallel cuts up to half the thickness of the post and work out the wood with the beige.
Step 5/5: Attach posts

Insert the posts, insert the beams and fasten them with bowl screws.
After this, you can begin to add the slatted walls, which are easily fixed with either screws or a nail gun. You can vary the spaces between the slats to suit your personal taste and needs. Once you decide on the amount of gap you want between slats, you can cut some blocks of wood to that size and use them as spacers while you nail/screw — making a fast job of it.
 Gerhardt Richter is a writer and a trainer at trade technical colleges, specializing in carpentry, plumbing, mechanics and construction.