


This guide outlines DIY woodworking projects for beginners with step-by-step instructions and important tips.
Hey there, DIY enthusiast! Ready to roll up your sleeves and dive into the world of woodworking? You’re in for a treat. Whether you’re looking to spruce up your living room with some floating shelves or jazz up your backyard with a custom picnic table, we’ve got you covered.
In this guide, we’ll walk you through some DIY woodworking projects for beginners that’ll have your friends wondering when you became such a pro. Don’t worry – we’ll break down each project with easy-to-follow steps, complete material lists, and insider tips to ensure your success.
By starting with these beginner-friendly woodworking projects, you’ll build confidence and skills that will serve you well as you tackle more complex DIY endeavours. So grab your safety goggles and let’s get going!
DIY woodworking projects for beginners: key tips
Start with the Right Tools
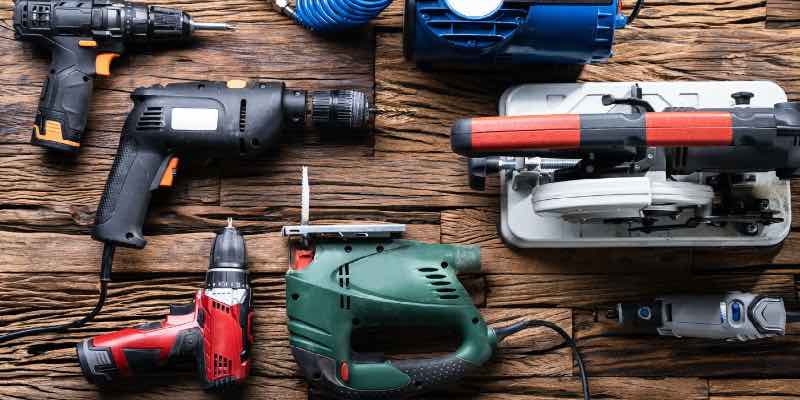
As a beginner woodworker, having the right tools is crucial for successful DIY projects. Start with essential hand tools like a jack plane, panel saw, and chisels. These will help you develop fundamental skills and precision. For power tools, consider investing in a table saw, drill, and sander to make your woodworking tasks easier and more efficient.
Choose Your Wood Wisely
When embarking on DIY woodworking projects, selecting the right wood is key. For beginners, softwoods like pine are easier to work with compared to hardwoods. However, as you gain confidence, don’t shy away from experimenting with hardwoods like cherry or maple for more durable pieces.
Master the Basics
To become proficient in woodworking, focus on mastering basic techniques. Practice fundamental skills like accurate measuring, making clean cut lines, and achieving smooth edges. Remember the golden rule: measure twice, cut once. This will help you avoid costly mistakes and improve the quality of your work.
Prioritize Safety
Safety should always be your top priority when working with wood. Wear protective gear like goggles, masks, and gloves, and always follow manufacturer instructions when using power tools. Keep your workspace clean and organized to prevent accidents and ensure a smooth workflow.
Start Small and Build Up
Begin with simple projects to build your confidence and skills. Try making a birdhouse, small shelves, or a basic wooden stool. As you progress, you can tackle more complex beginner-friendly woodworking projects like side tables or bookcases. Remember, patience and practice are key to improving your craft.
DIY woodworking projects for beginners
These beginner-friendly tutorials will guide you through each step, ensuring success even if you’re new to DIY projects.
Shelves
Ready to tackle your DIY woodworking projects for beginners? Let’s first dive into creating beautiful, functional DIY wood shelves that will instantly upgrade your home decor.
You will need:
- 1″ x 6″ pine boards (length depends on desired shelf size)
- Heavy-duty shelf brackets
- Wood screws and wall anchors
- Wood stain or paint
- Sandpaper (120 and 220 grit)
- Level, measuring tape, and pencil
- Power drill and saw (circular or miter)
1. Measure and Cut
Start by measuring your space and deciding on the shelf dimensions. Use a miter saw to cut your boards to the desired length. Remember, for most rooms, shelves between 24″ to 36″ work well. Sand the cut edges smooth for a professional finish.
2. Stain and Finish
Apply wood conditioner to help the stain absorb evenly. Then, use your chosen stain color to give the wood a rich, warm tone. For a more modern look, you could opt for paint instead. Allow the finish to dry completely before moving on.
3. Install Brackets and Mount
Locate wall studs using a stud finder for maximum support. Mark your bracket positions with a level, then pre-drill holes and securely attach the brackets. If studs aren’t available, use wall anchors for added stability. Finally, place your beautifully crafted shelves onto the brackets, and voila! You’ve just completed your first DIY woodworking project.
Outdoor bench
Building your own outdoor furniture can be a rewarding and cost-effective way to spruce up your patio or garden. With just a few simple tools as one of your first DIY woodworking projects for beginners, you can create beautiful, custom pieces that will last for years.
- Choose pressure-treated or weather-resistant wood for durability.
- Work on a flat, stable surface to ensure the bench is level.
- Enlist a helper to hold pieces steady during assembly if possible.
You will need:
- Measuring Tape
- Saw (Hand saw or circular saw)
- Drill and drill bits
- Screwdriver
- Clamps
- Sanding block or orbital sander
- Paintbrush (if staining or painting)
- Seat: Two 2″x6″x48″ boards
- Legs: Four 4″x4″x18″ posts
- Braces: Two 2″x4″x48″ boards
- Cross supports: Two 2″x4″x15″ boards
- Screws: 3″ outdoor wood screws
- Wood Glue (optional, for extra stability)
- Wood Stain or Outdoor Paint
- Clear Outdoor Sealant
1. Prepare Materials
Measure and cut wood to the specified dimensions. Sand all edges and surfaces to avoid splinters.
2. Build the Seat Frame
Lay two 2″x6″x48″ boards parallel to form the bench seat. Attach a 2″x4″x48″ brace to the underside of each long edge for stability. Secure using screws spaced every 6-8 inches.
3. Attach the Legs
Position one 4″x4″x18″ post at each corner of the seat frame. Drill pilot holes to prevent wood splitting, then screw each leg into the frame (two screws per leg).
4. Add Cross Supports
Place one 2″x4″x15″ board between each pair of legs (front and back) near the bottom for added stability. Attach using screws at each end.
5. Stain or Paint
Apply wood stain or outdoor paint to protect the bench from the elements. Allow it to dry as per product instructions. Seal with a clear outdoor sealant for durability.
6. Final Assembly and Touch-Ups
Ensure all screws are tight and the bench is level. Sand any rough spots after assembly and apply additional sealant if needed.
Rustic Picture Frame
Building a rustic picture frame is another of the simple and rewarding DIY woodworking projects for beginners.
You will need:
- Measuring Tape
- Saw (Hand saw or miter saw for precise angles)
- Clamps
- Hammer
- Nails (small finishing nails) or wood glue
- Sanding Block or orbital sander
- Paintbrush (optional for stain or paint)
- Wood Slats (1″x2″ or 1″x3″ boards)
- For an 8″x10″ frame: Cut two pieces to 8″ and two to 10″
- Glass or Acrylic Sheet (optional, cut to frame size)
- Backing Board (thin plywood or cardboard, cut to frame size)
- Picture Hanger or sawtooth hanger
- Wood Stain or paint (optional for finishing)
1. Prepare the Wood
Measure and cut the wood to the desired dimensions for the frame. Cut ends at a 45° angle for a mitered joint or leave them straight for a butt joint. Sand all edges and surfaces until smooth.
2. Assemble the Frame
Arrange the wood pieces into a rectangle, ensuring the corners fit tightly. Apply wood glue at the joints for extra strength, then secure using clamps. For mitered corners: Use small nails to reinforce the joints once the glue dries.
3. Attach the Backing
Place the glass/acrylic sheet inside the frame if using.
Lay the backing board over the glass and secure it with small nails or staples along the frame’s back edge.
4. Add a Picture Hanger
Attach a sawtooth hanger or other hanging hardware to the back of the frame.
5. Finishing Touches and tips
- Apply a wood stain or paint for a rustic look. Let it dry as per product instructions.
- Seal with a clear varnish for durability if desired.
- Choose reclaimed or weathered wood for an authentic rustic appearance.
- If you’re working with glass, handle it carefully and smooth any sharp edges.
- Consider embellishing the frame with twine, burlap, or other rustic materials.
Conclusion
There you have it – a crash course in beginner woodworking projects to spruce up your home! With these step-by-step guides, you’re well on your way to creating custom shelves, outdoor furniture, and decor pieces that’ll make your friends wonder if you’ve gone pro.
Remember, practice makes perfect with DIY woodworking projects for beginners, so don’t sweat it if your first attempts aren’t Pinterest-worthy. Keep at it, learn from your mistakes, and soon enough you’ll be sawing and sanding like a champ. Now grab those tools, roll up your sleeves, and get ready to transform your space with your own two hands. Happy building!