


You’d be horrified to hear that 20% of toys tested by the Chemicals Agency contain banned phthalates. These are toxic chemical compounds that are often found in plastic films, packaging or flooring. Although the regulations regulate their use, they are also found in some children’s toys. So why not make wooden toys in easy steps.
Wood is the perfect alternative to plastic for your children to have fun without risk, especially if they still carry their toys in their mouths.
How to make a wooden hobbyhorse
Toys do not always have to become a worthless disposable. Even today, there are still high-quality toys. This is especially true for home-made wooden toys. This often survives several generations of children and adults. Above all, home-made wooden toys will strengthen the connection between children and parents on a daily basis.
With our rolling animals, these toys promote concentration and fine motor skills in children from 10 months of age, according to experts in early childhood education. And they are also easy to make.
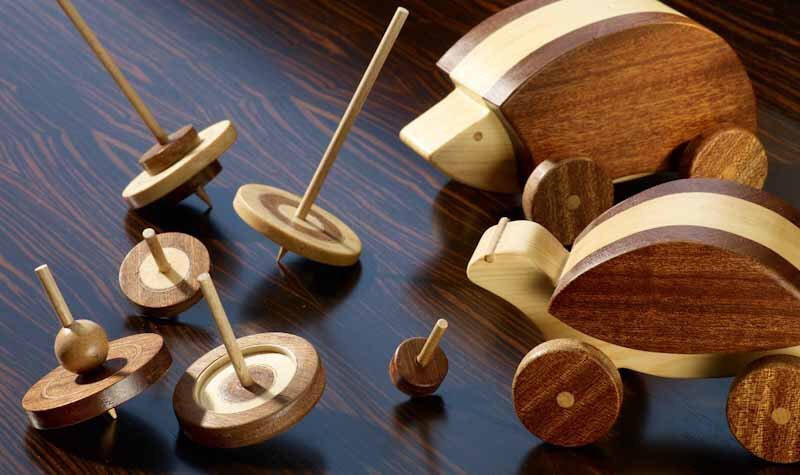
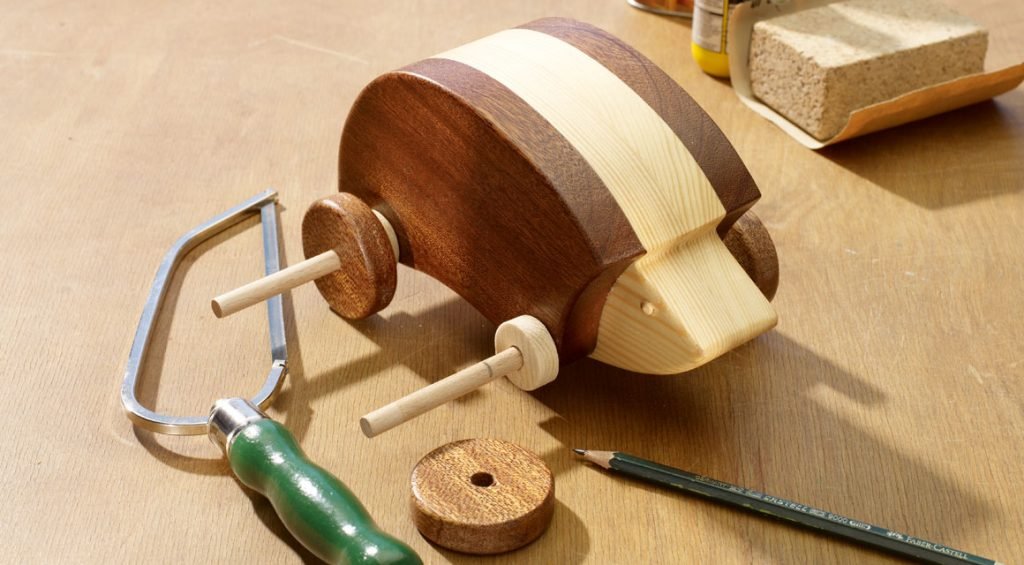
The body of the wooden animals consists of three parts. In order to achieve colour contrast, center and side parts are made of different tinted wood. This eliminates the need for tinting or painting. Our choice was pine wood and mahogany.
The surface treatment is carried out with a silk-matt wood lacquer. This must comply with the safety standard EN 71 in order not to endanger children. If you want to start small first, our 10 mm thick wood gyroscopes are just the thing. They are quickly produced and certainly bring killer fun also for adults. The axles are made of 6 mm round wood.
Make wooden toys in easy steps: In the beginning was the wheel
The spinning tops and the rolling animals have one thing in common: the disc wheels. The production of such small wheels is very easy. All you need is a hole saw. It serves to saw holes, but what comes out by the way is a circular disc. And this with a centric hole for the axis. This bore initially has a diameter of 6 mm, which is sufficient for the gyroscopes. For the sliding animals, however, it is recommended to drill the holes in the wheels on 8 mm and take appropriate round woods. This is more stable and prevents axle breakage.
With a hole saw, however, it is not only possible to produce discs: if you change the saw blades step by step, you get concentric rings. They can be reassembled into discs. This doesn’t seem to make sense at first, but if you use different types of wood for this, interesting effects can be achieved through the color contrasts.
The finishing is best done with a drill, which is clamped horizontally in a bracket. Such a bracket improvises an expensive rotary or turning bench in no time.
Hedgehog and turtle: plans

The templates are reduced in size. The easiest way is to copy them up to 200%. If you cannot use a copier, first transfer the grid to the wooden plate, then the outline. The squares must have an edge length of 40 mm.
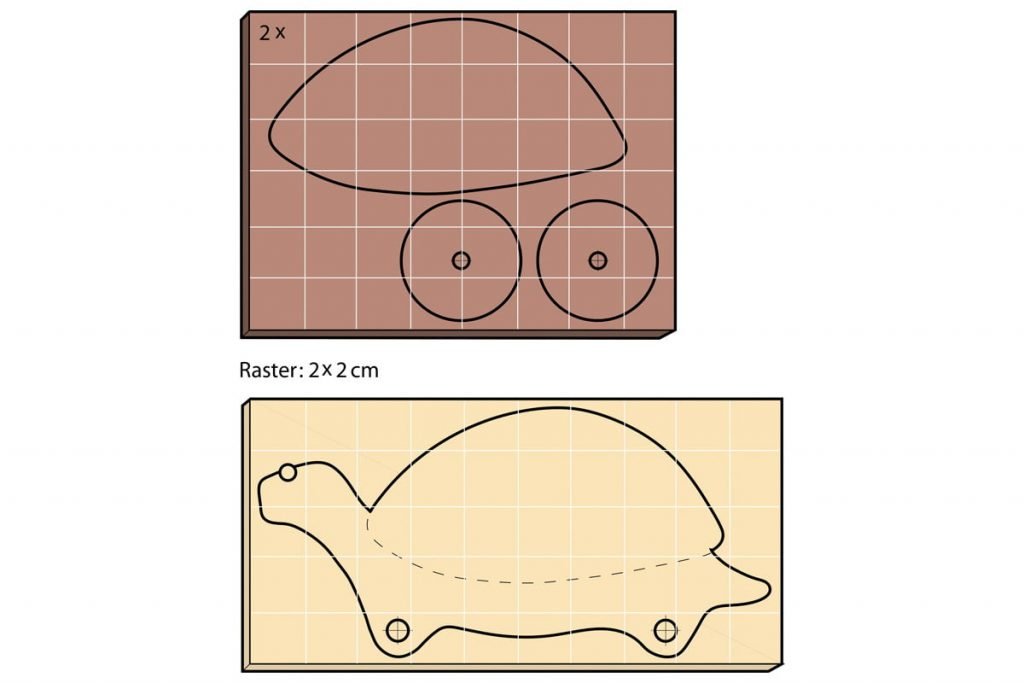
The turtle is built in the same way as the hedgehog. The material thickness is 40 mm for the middle part and 20 mm for the side parts and the disc wheels. The hole of 4 mm for the eye is carried out before sawing. Material cost per animal: about $20 if you have to buy the wood specially — much less if you have offcuts sitting around from other projects.
Make wooden toys in easy steps: Instructions for the top
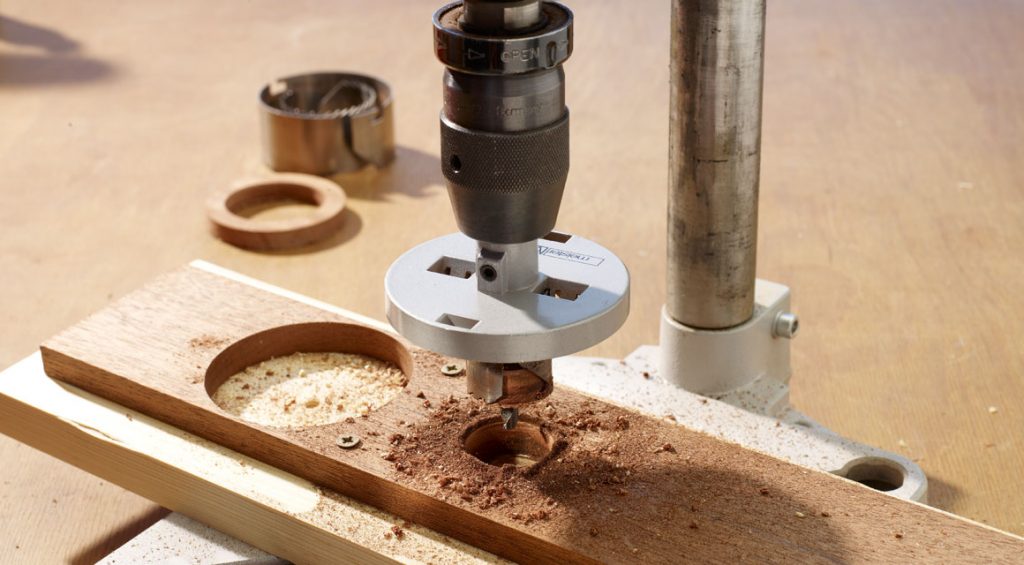
Fasten the board with screw clamps so that it cannot slip. Now start sawing with the smallest diameter.
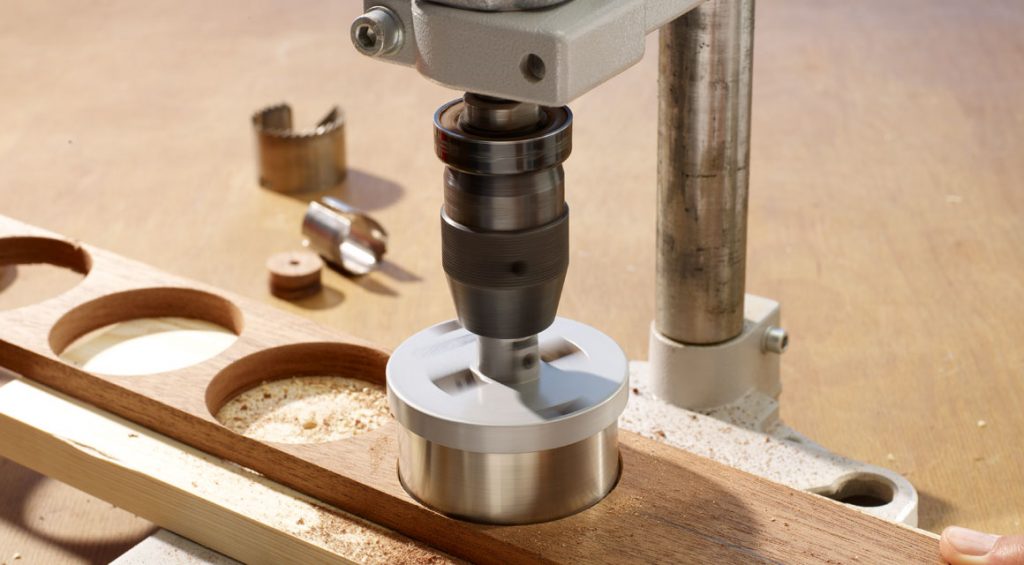
One by one, the saw blades are used with increasing diameter and thus the concentric rings are produced.

Since the saw blade removes material, there is play between the rings. This can be filled with handicraft thin strips.
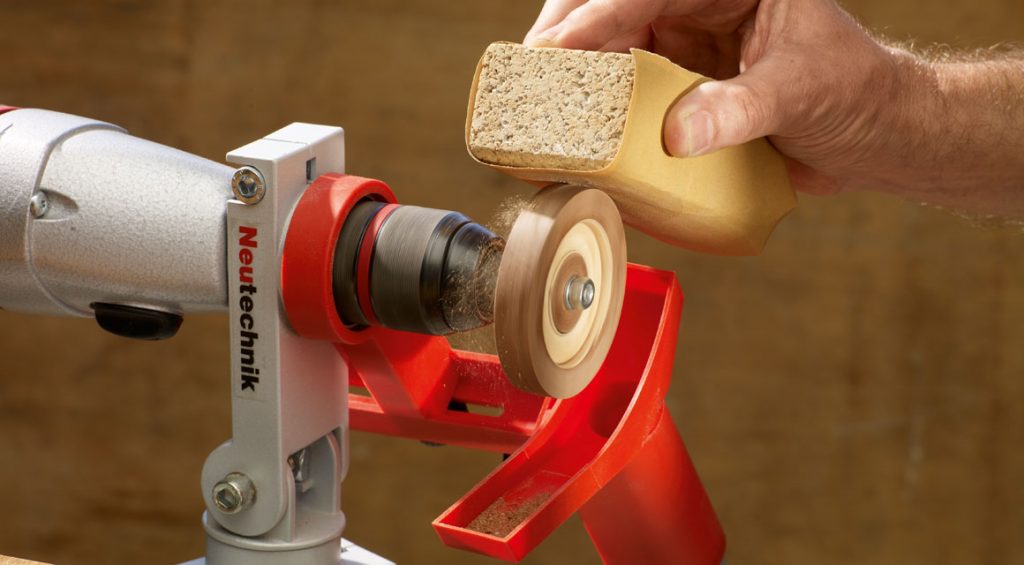
After drying, the discs can be smoothed off with the help of a horizontally clamped drill and sandpaper.

When the axles are glued in, the gyroscopes are treated with wood lacquer.
The rolling hedgehog and turtle
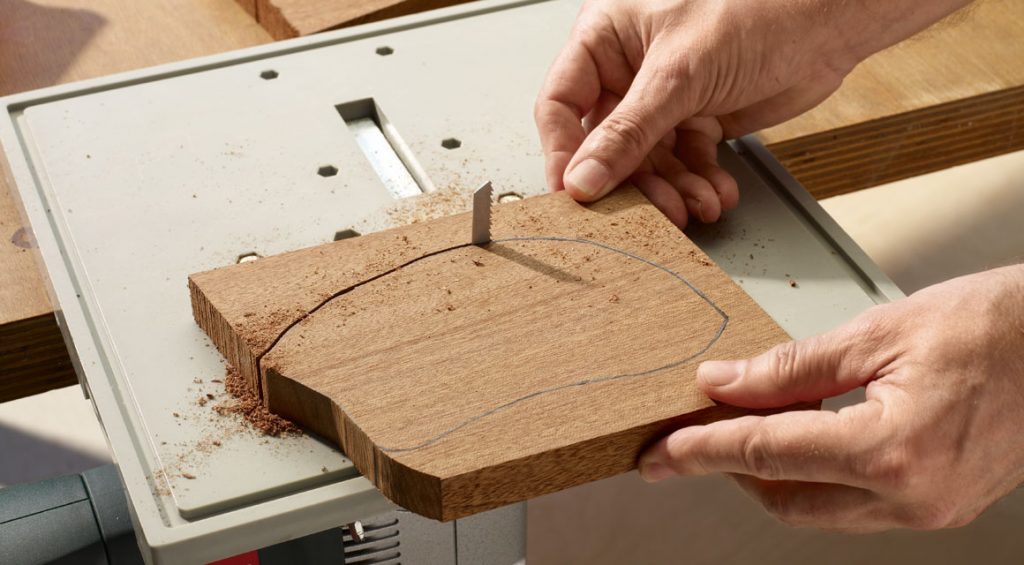
A jigsaw table makes it easier to create the animal contours: both hands can guide the workpiece. However, if you do not have a table, you can clamp the wood with the cutting line free of the bench, and then just move it as you need to in working your way around the outline.
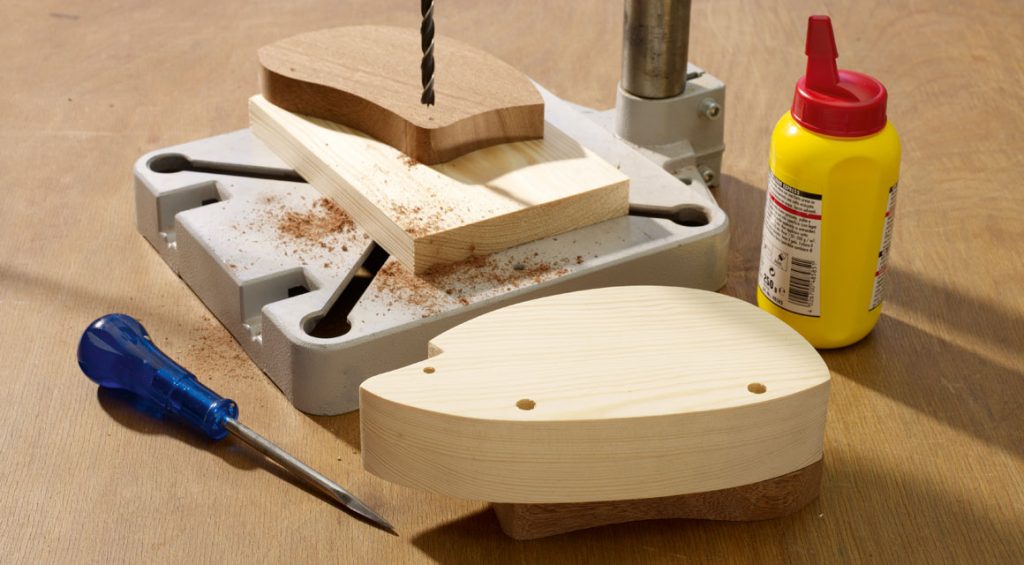
With the help of a stencil, you mark the axis holes and then drill them.
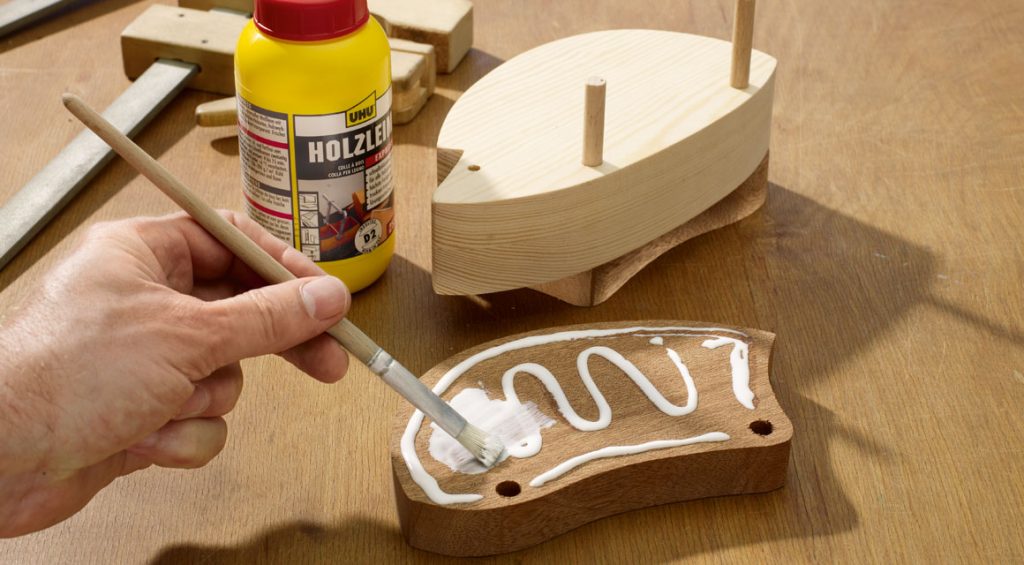
The sides are glued to the middle part, while round rods are used to prevent glue going into the axle holes … Remove the rods before the glue is dry.
Between wheel and figure you should insert a small disc as a spacer. It prevents the two parts from sticking together.
Make wooden toys in easy steps: other ideas
Railway and farm
A railway or a wooden farm does not require great skill for the hobbyist. In addition, they offer the possibility to resupply parts again. Thus, over time, a large rail construction from the first set of the wooden railway or a true estate with many wooden animals from the first small farm becomes. Even additional barns and landscapes can be built from wood to match the farm.
Zoo
Similar to the farm, a zoo with many animals is a real asset for every children’s room. The animals are made with a fret saw and a little paint. The stencils for the individual animals are available everywhere on the Internet. If you prefer to do without color, it doesn’t matter, because the shapes are meaningful enough in many cases.
Doll cradle
The most important tool for many wooden toys is the fretsaw. It allows for the fine, precise cuts required for delicate toys. A simple doll’s cradle can be built in a very short time. The simplest version consists of only four parts, which are connected with recessed screws.
Board games
The traditional board games such as lady, mill or chess can be easily made of wood itself. For the chess pieces you do not even have to do a carving course, but you can also cut out the pieces with a fret saw and make them firm with a small round foot.
Backgammon
Because of the inlays, a backgammon game is a bit more difficult to produce. But you can cheat a bit if you use very light maple wood. The dark fields are then simply created with dark glaze. You have to work with tape pretty correctly, but the result will be very convincing.
Bowling alley
You can also build great wooden toys for the garden. A bowling alley, for example, is not only a pleasure for the children in the right size. The balls made of wood are a bit elaborate, but the work is worth it. However, all wooden toys used outdoors should be allowed in with good weather protection.
TIPS & TRICKS
For the very young children, you can first try your skills on building blocks with letters and numbers. The production is very simple, but basically this is the perfect practice for you as a budding toy manufacturer. Do not make the blocks too small so that the children cannot swallow them, and pay attention to the paintwork, which could be nibbled at by the children. So usually only food coloring is suitable for the wooden blocks.