

This guide outlines step by step how to test a relay in a car or other equipment, and how to replace one if needed.
Relays are electromagnetic switches in the car that can be used to switch electrical functions on and off. For example, if blinkers or windscreen wipers no longer work, a broken flashing relay or interval relay can be the cause — in addition to a defective fuse, of course — so it is useful to know how to test relay modules.
What kind of relays are in vehicles?
Robustly manufactured relay types are used for use in motor vehicles, which can withstand high temperatures and shocks. They work with the voltage of 12 or 24 volts on board, thus switching higher currents. How to check the value of cars to buy or sell: smart guide
Most relays are connected with 6.3 mm flat plugs and often have additional diode or resistance in the housing, which limits the counter-induction voltage. Many types of relays installed in modern cars usually have other functions and have long since mutated into small electronic control units (ECUs) or electronic assemblies. Examples include:
- The flashing relay sets the timing for the blinker.
- Whether with interval time adjustable by the driver or controlled by a rain sensor: The interval relay is the timer for the windscreen wiper.
- The gasoline pump is supplied with the necessary fuel by the gasoline pump relay, depending on the speed.
- The glow time relay is responsible for the timing and control of the current path of the glow plug in the diesel engine.
- The EGR relay controls the recirculation of the exhaust gases depending on air pressure and speed.
- The parking sensor alert function and the electric exterior mirror are also controlled by a relay.
Even though small ECUs or electronic assemblies now ensure the function of such equipment features, relays are still available in many of these devices. The actual term is rather historically shaped, after all, in modern motor vehicles, complex control units have long been used to circuit electrical features and components.
How to test a relay in a car
If you want to quickly test a relay from the car for its function, then you usually do not need more than a simple battery (9V to 12V) and a multimeter. In this guide, we explain how you should do this to get a clear result. It should not matter whether it is a starter relay, starter relay or turn signal relay. Also read our guide on How to test an alternator with a multimeter or without: step-by-step.
Almost always, information in the form of a schematic and/or the technical data is printed. First of all, you are looking for whether a voltage is specified, with relays for cars there should be 12V on it, with very old (or for old fzge) also 6V. If there is about 24V on it, they are for trucks or similar vehicles with a 24V on-board system.
If you want to install one of them, the voltage specification must match the on-board mains voltage of your vehicle. The voltage refers to the coil at the relay, i.e. the control circuit, the switching or working group may well have a higher or lower voltage!

So the first step to test and measure a relay is the identification of the type of relay you are dealing with. This is usually printed on the relay itself. A short search on the Internet for the type (eg: relay HF3FD pictured) and the corresponding data sheet should then quickly lead to the information you want. It is important to also pay attention to the second line on the relay, because the exact specification is printed there.
Example: HF3FD relay
012 in this case means 12V
Z provides information about the design
T determines the material of the contacts
F names the class of insulation
The text in brackets is a code of the brand with special requirements
Armed with this information, the required information can be quickly found in the data sheet. The resistance of the coil has around 400 ohms in the 12V variant. The current must not exceed 1 A. The design provides information about the assignment of the pins. On the side with the three pins, the contacts of the coil are on the outsides. The middle contact is then switched through to the contacts lying on the other side. Also read our guide on How to test a car battery: simple step-by-step guide.
How to test a relay: Step-by-step instructions
- Put on rubber gloves
First of all, you should put on rubber gloves to protect your hands from possible injuries. Finally, you handle a battery from which acid can leak or sparks may fly
2. Switch on the relay
Next, try to switch the relay on by repeatedly holding the positive and negative terminals at the appropriate terminals (positive pole to terminal 86 and negative pole to terminal 85).
A crackling should be heard during the touch. If this is the case, then you can proceed to the next step. However, if the relay does not switch, it is probably defective.
3. Attach alligator clamps
Next, you should check the continuity on the relay. To do this, first plug the alligator clamps into the clamps 87 and 30 of the switching device.
As with the battery, the red cable comes to the 86 and the black cable to the 85 on the relay. In addition, you must plug the cables into the sockets of the same color on the multimeter.
4. Set multimeter
You also have to set the switch of the multimeter to continuity test. The symbol for this varies from device to device and is usually displayed as a note or sound waves, because the multimeter emits sounds in this position.
5. Check continuity
If everything is properly wired and set, you can finally check the continuity on the relay. To do this, you must switch the switching device as in the first step. The multimeter should display a value and give a sound when the relay is functional.
How to replace a relay in the car
First, you should find out where the defective component is in the car. Some of them are listed in the logbook, often the components sit on the right side of the engine compartment or under the steering wheel on the left.
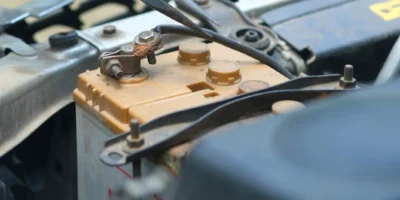
If you are lucky, the schematic is recorded on the veneer. Make sure that you do not confuse the relay box with the fuse box! Before you start the replacement, you must in any case disconnect the battery of the vehicle.
Once you have identified the defective relay, you should check whether there is a similar component in the box. With this, you can easily test whether the electromagnetic switch is actually the cause of the non-functioning of blinkers or windscreen wipers.
Most relays are plugged in, but they can still sit relatively tightly. Make sure that you do not damage anything when you remove a part. Use a screwdriver to replace the defective component with a identical component. Remember: The battery should be reconnected for the functional test – otherwise no power will flow.
If the relay is the cause of the defect, order a suitable one: You will find the necessary data if you observe the rated voltage of the coil, the type of contacts, the maximum switching current and the special features.
If the blinker does not work after the devices have been replaced, reinstall both relays where they were originally. Maybe both components are broken or the defect is hidden elsewhere. As soon as everything is ready, you should close the relay box again and finally disconnect the battery.