


The paint has to go – so much is clear! But by what means are doors, windows and furniture really the easiest and quickest to get rid of the old paint layers? We have tried out the possible chemical and mechanical variants for you for the best way to remove paint on paint on windows, furniture and doors.
Every time you renovate walls, floors and ceilings, you creep around: the old skirting boards, doors and frames are thickly coated with old layers of paint, but do you really want to get them all down? Then it’s better to paint over it for the sixth time, even if the narrow profiles of the cassette door are barely recognizable as such.
But at some point you will not be able to avoid a complete refurbishment. The result of the painting is in fact unsatisfactory in almost all cases. The old drip noses, cracks and flaking remain visible. Then you need to remove paint on windows, furniture and doors
In such fumbling, dusty and – let’s say calm – stinking works such as paint removal , the effort and the goal should be in a reasonable ratio. So the first question is always: how should the object, in our case an old cassette door, look like later?
Remove paint on windows furniture and doors: You should pay attention to this
If you want to give a well-preserved white door only a little new shine, usually a slight sanding of the surface and the recoating is sufficient. However, this is not endlessly feasible, after the third “Light” renovation you should remove the paint layers once completely. Find out which devices are best suited for grinding .
If, on the other hand, you want to completely free the door from the paint to enjoy the bare, but warm wood tone, you have to drive heavy equipment or chemicals to remove paint on windows furniture and doors.
At the latest here, our experience with the door shows that there is no or only with profiled surfaces. If you decide to sand down, you will face a problem at the latest due to the fine curves and edges of the cassettes. A paint stripper is much more convenient to use than sandpaper.
Do you want to pickle the whole door, which is technically natural, do not come around for a subsequent coarse and fine grinding, which prepares the wood for the subsequent painting. So the solution is a mix:
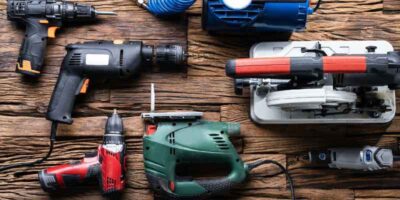
Use a powerful grinder for the surfaces . The best is here the orbital sander suitable, which has the largest removal rate, but does not scrape grooves in the wood like a belt sander.
For the profiles you prefer to use a low-solvent paint stripper. If the profiles have been varnished several times, you have to apply the paint stripper once per shift and let it work for about one hour.
Sanding or chemicals?
At this point, we must fairly point out that both methods have their drawbacks: fine dust when grinding and very stubborn odors when pickling .
The door renovation should therefore always be done in the fresh air or at least in wide open windows. Although the paint stripper we use is free of the usual aromatic solvents, its odor is anything but pleasant.
At the hardware store you will also find solvent-based products – their evaporating ingredients can even cause headaches in sensitive people. However, they are even stronger and faster in their dissolving effect on the old paint coats .
The grinder is in urgent need of the dust bag, especially if you grind large surfaces. The friction heat of the orbital sander not only produces dust, but also unpleasant odors.
Because the bag will not catch anything on most machines, you should also have a vacuum cleaner available that will allow you to vacuum the grinding area about every ten minutes . Otherwise, a fine layer of dust prevents the grinding wheel from being in direct contact with the paint surface, and you will hardly make any progress with your efforts.
In addition, the grinding has another disadvantage: A rotating sandpaper tears the paint surface downright and removes them, only the grinding wheels settle quickly. Paint strippers ensure that paint components lose their adhesive power on the wood.
Remove paint with sanding and stripping: step by step
Removing hardware:
Remove the metal hardware prior to any pickling or sanding treatment. Then the subsequent painting becomes cleaner, and you do not have to mask anything.
Sanding the door:
To sand the surface of the paint, use an orbital sander and a maximum of 120 grit sandpaper to coat the surface of the paint.
Sanding with steel wool: To sand the profiles, use a medium-fine steel wool. The fits better to the profile contours better than normal sandpaper.
Apply a paint stripper:
Above all, fine profiles should be painted with the paint stripper. Always wear rubber gloves, as the paint stripper irritates the skin.
Paint brushes:
For paint strippers you get special brushes in the hardware store. They have a plastic shaft and not made of metal, which would be attacked by the stripper.
Sanding off the layer:
After stripping, a thin layer remains on the wood, which you must sand down. To remove residue from the paint residue, you must sand with 80-gauge paper.
Remove paint:
When sanding patience is required above all. Incidentally, the thing with the dust is completely independent of the grinding machine used and the abrasive grain . Even when lightly sanding the surface with an orbital sander and a 120-grit paper, you must clean the surface regularly.
Here the more thorough steps, because the dissolved dust on the same-colored door is not visible. Wet wiping binds the dust even more.
If your old treasures have metal fittings such as lever handles, hinges or locks, it is strongly advised to completely remove them before renovation. Especially around the fittings around the time often one or the other Lacknase of the last coat settled down, which you can not cleanly remove with mounted metal. In addition, the vast majority of metals with ugly discoloration react to contact with paint remover.
Once the fittings are off, you can also give them a thorough cleaning or even think about a complete replacement. Because the old screw holes are usually worn out or are no longer suitable for new fittings, they should be filled before varnishing or sealed with special, new drillable filler.
If the old piece is ready to be sanded, the question arises of the grain. Our experience shows that it must be at least 80 or coarser paper to bring down the old paint in a timely manner.
Patience is needed here, because the usual tricks, a high contact pressure of the grinder and a high speed, lead rather to the already mentioned strong odor and dust nuisance than to a faster removal. The coarser cut really needs to remove everything you want to remove.
The subsequent grinding with finer grain only serve to remove the rough traces of the previous one. For the last sanding take 120 paper. For grooves, edges and profiles, use the stripper .
Important: Always use rubber gloves to protect your hands from the corrosive effects. The paint stripper is applied with a brush and then left alone until the paint throws fine bubbles.
Now you can scrape the raised paint with a spatula. But beware: Even a relatively blunt spatula can damage the profiles in careless and overly brutal use.
Our tip: Always just loosen what is going well and then apply the paint stripper again. So let the chemistry do the dirty main job, and then you’ll have the final say in the final fine-tuning with the medium-grade steel wool.
Before repainting: repair defects
Before painting , you have once again the last opportunity to assess the overall condition of your upscale treasure. For example, in the case of old doors, the edges have given way over time to squareness and are broken and / or irregularly rounded off by use.
A good way to further enhance the appearance, it is therefore generally round off all edges of the door with a router to a uniform radius. The ugly breakages are thus largely eliminated. You can borrow the router for small money in the hardware store, as well as the corresponding rounding cutter.
For cracks, spalling and holes, apply a paint spatula, which you apply with a Japan spatula. We recommend a spatula based on synthetic resin, which is a little more elastic, and you can process any kind of varnish on it.
It has been proven to moisten the places that are filled before a little. That binds the dust. For very small imperfections and holes, it is advisable to enlarge or drill them a little. This will also extend the adhesive surface for the spatula.
In addition, you should always pull the mass very generously over the defect, so that any approaches for later fine tuning disappear. Always work around the quilt over a large area in order to remove the paint spatula as thinly as possible. After drying the spatula, the mass shrinks minimally in itself (similar to the grout in plasterboard).
Afterwards, you have to sand it again and then fill it a second time, if it really should be good.
Instructions step by step
Remove fittings
Important: Before any paint remover or sanding treatment, you must remove all metal hardware. This will make later painting cleaner and you will not have to mask anything.
Alternative: Remove paint and glue with the heat gun
Remove paint with the heat gun.
 Gerhardt Richter is a writer and a trainer at trade technical colleges, specializing in carpentry, plumbing, mechanics and construction.