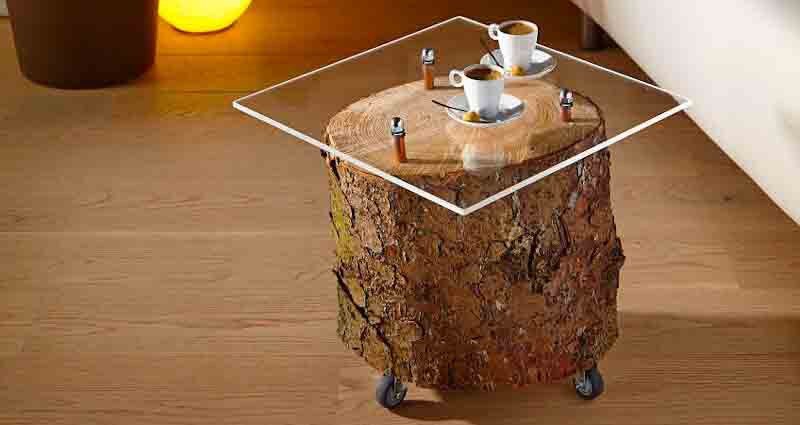


Round rusticity meets square modernity. Our tree trunk side table made of a solid log is covered by a frameless glass plate. An exceptional table – and very fast to construct. Our step-by-step guide shows how to make a tree trunk side table.
Although walls of rustic living room cabinets in the rustic country style are no longer trendy, the tendency to the individual piece of furniture with the note “pure nature” is becoming more and more energized. Whether bookboards, stools, chests – or especially tables: Free-standing pieces of furniture in the room, used almost as nature created them, become an eye-catcher in a furnishing that otherwise shines with a perfect finish.
You don’t have to learn how to use the chainsaw for our side table from a piece of trunk. Parts of tree trunks are rarely available in the DIY store, but any good nursery or local forestry can give you a tip where to find it.
A sawmill will probably belong to the neighborhood with the fewest readers. Keep in mind the weight during transport: for example, a 40 cm high and wide acacia trunk can quickly weigh more than 70 kilograms.
Make a tree trunk side table: what you need
Material: Tree trunk, acrylic glass plate, copper tube, stick screws (M10 x 100), hat nuts (M10), washers, steering rod rollers, spax screws 5 x 30 (for rollers)
Tools: Hand circular saw, rasp, cordless drill/sinker, water scale, metal saw and arrow, Forstner drill
To prepare the tree trunk
Be careful when handling the glass plate to avoid slackening at the tips and scratches on the surface – the protective film tears quickly. When cleaning the bark, guide the brush especially vertically.
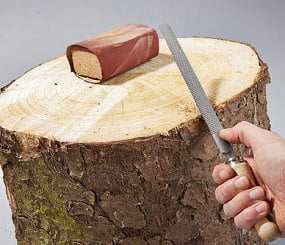
1.) Using 80 grade sanding paper and a coarse file, sand the top surface and smooth the edge.

2.) Cut the plexiglass pane to measure with saw and guide rail. A strong styrofoam plate serves as a base.

3.) Clean the block with a root brush. Especially when crossing, make sure to remove only the really loose pieces of the bar.

4.) The three boreholes for the stick screws should be as far out as possible – and approximately at the same angle to each other.
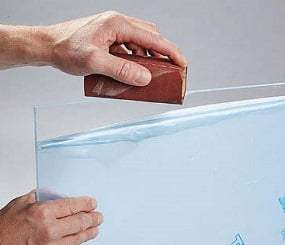
5.) Carefully to prevent scratches on the surface, break the cutting edges with 120 grain. Loosen the protective film on the edge for this.

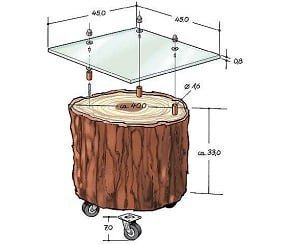
6.) The higher the tree table, the larger the tree diameter must be. Ideal for stability: diameter > trunk height.
Assemble the glass plate
The highest stick screw is completely screwed in, the other two are then aligned horizontally to it.

1.) Be used with a wood drill – through the protective film! – the marked holes for the stick screws drilled (10 mm).

2.) Align the plate appropriately and then transfer the borehole positions to the tree trunk surface.

3.) To avoid scratches, place the plate on a clean surface when the film is peeled off, for example a piece of carpet.

4.) The boreholes are lowered with a sinker. Remove shavings immediately so that they do not cause scratches.

5.) With an 8 mm wood drill, the already marked positions for the pole screws are pre-drilled vertically.

6.) When screwing in the stick screws, pay attention to their perpendicular position. There is no need to create a right angle to the wood, instead they must carry the glass perfectly level.

7.) Do not screw in until the stop,because you have to align the three screw ends horizontally to each other.

8.) Remove 5 mm from each screw height for the nut, as well as the thickness of the glass pane and two washers.

9.) The sleeves are cut with the dimensions just determined. They serve as carriers of the glass plate.
Make a tree trunk side table: assembly
The glass plate rests on the copper tube and the underlying washer. The hat nut has a rather decorative function, so do not tighten it too tightly if it is not screwed up to the stop.

1.) When putting on, make sure that each sleeve is placed on the screw to the extent of which it has been sawn appropriately.

2.) After each sleeve and washer, the plate is placed. This is followed by a washer again.

3.) The hat nut is used for cover. Don’t tighten too tightly. The disc should not be under great tension.

4.) Rotate the tree trunk and attach the three rollers at the bottom. To avoid scratches, you can do so at the beginning.

5.) The tree table is ready. The horizontal plate position above the slightly sloping cutting surface of the trunk is clearly visible.
How to make a side table from leftover wood
How to make an industrial style coffee table
How to make an epoxy resin wood table
 Gerhardt Richter is a writer and a trainer at trade technical colleges, specializing in carpentry, plumbing, mechanics and construction.