
This article explains the best practices and tips to help you perform the basic routine of first-time DIY car servicing on your car correctly.
Find more car and motorcycle guides, tips and advice
How to get first-time DIY car servicing right
Regular maintenance is one of the inevitable duties that come with car ownership. If you are reading this article, it’s a fair assumption that you are looking for ways to reduce your car’s maintenance cost. And DIY car servicing is the best place to start.
ALSO READ: How to check the value of cars to buy or sell: smart guide
How to buy a classic car: what to consider before you buy
Before you start
DIY car servicing is a fairly easy job unless you drive a sports car or a high-end luxury coupe. You will not want to risk the performance of your expensive vehicle, and therefore should avoid tinkering with components under the hood.
However, if you drive a regular family car or a hot hatch and know how to jack up the car on the front two, you can service it in your garage or on the driveway.
First things first
Make sure you have a basic tool kit and the good-ol’ wrench to get the job done safely and neatly. Also, your car should be parked on a levelled, concrete surface. Place a plastic sheet underneath the car to catch fluid spills. This simple preparatory measure can keep your floors from getting oil and coolant stains.
Also, wear rubber gloves to avoid contact with hazardous car fluids. Servicing with bare hands often leaves the grease under your nails, which is hard to get rid of.
If possible, service your vehicle under the supervision of someone who services their car on a regular basis. And always buy quality spare parts if you don’t have access to OEM parts. You can order online from the Parts Geek warehouse to avoid a trip to the local store on the day of service.
Buying supplies for the service
The first thing you need is engine oil. Make sure you buy the right grade as recommended by the manufacturer. You may need coolant(to be changed every alternate service), air filter, oil filter, cabin filter, windscreen washer fluid and battery water.
Getting started
A car service involves multiple jobs, and following the correct order is crucial to saving time and avoiding re-works. Here’s the recommended order of jobs and tips to do them the right way.
Preliminary step

Check the oil level. The dipstick for the oil level is usually clearly visible in the engine compartment. It is simply pulled out, wiped off and once again dipped into the opening as far as it will go. The oil film on the rod shows the oil level in the engine. If there is a need to refill:
Step 1
Jack up the front of the car to get enough clearance for the oil pan. Make sure the jack stands are firmly placed and do not squeal under pressure, as this might distract you from performing the service.
Step 2
Locate the oil drain plug and place the oil pan directly underneath it to catch the oil. If your ‘oil drain plug’ points horizontally, place the oil pan a little further away to avoid spills.
Step 3
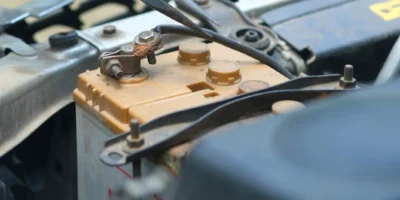
It may take 3-5 minutes until the oil fully drains out. In the meantime, change the air filter and cabin filter; check coolant level – top-off if required. Make sure all the lights are working on the battery supply.
Step 4
Once you have all the oil in the pan, replace the oil filter and seal. Most DIYers tend to use the old oil filter seal, which sometimes fails to serve the intended purpose and causes the oil to drip down on the driveway.
Step 5
Make sure the oil filter and the drain plug are tightened up. Avoid torquing too tight as this can give you troubles during the next service. Once everything is back in place, pour fresh oil into the engine. Keep a clean piece of cloth handy to wipe off any oil spills.
Check coolant
A look into the engine compartment can often reveal minor problems. The coolant is usually refilled using a round container made of white plastic. There are two markings on this. When the engine is cold, the coolant level should be between these marks.
Coolant should always be topped up when the engine is cold, otherwise there is a risk of severe burns when the container is opened. The cooling circuit can best tolerate distilled water from the drugstore. This hardly forms any deposits and is therefore particularly suitable.
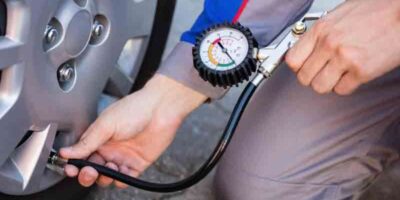
Check tires
Driving with the wrong tire pressure can damage the car in the long term. You can check the tire pressure yourself at almost every gas station. The employees are happy to help with the use of the equipment, which is usually free of charge. Tires properly inflated Not only do they run more economically, they also ensure greater safety. The tire tread can be checked with a tread knife or a thin ruler during maintenance. According to the experts, at least 1.6 millimeters are required, and at least three millimeters are even better.
Check brake and hyrdaulic fluids
In addition to gasoline, every car needs a few other fluids to run properly. If it becomes apparent during maintenance that the level of the brake fluid is too low, a visit to the workshop is urgently necessary, because the amount of fluid should not actually change. Changes indicate leaks that can quickly become very dangerous. Every DIY maintenance includes checking the hydraulic fluid for the power steering. If the fill level is low, this should also be refilled.
Checklist: These fluids should be checked during maintenance:
- Engine oil
- brake fluid
- Windshield washer fluid
- cooling water
- Hydraulic fluid
- Transmission fluid (automatic transmission only)
- Coolant for air conditioning
The correct fill levels and the corresponding filler necks are listed in the operating instructions for the car. Only suitable fluids should be used for home maintenance.
How to test an alternator with a multimeter or without: step-by-step
How to test a car battery: simple step-by-step guide