

If you came across well-preserved driftwood on your last walk on the river bank or on the beach, you can use it to implement beautiful DIY projects. But first the pieces of wood have to be prepared accordingly. Here is how to use driftwood for craft projects.
Driftwood is ideal for creating stylish objects for furnishing and decorating. Each piece is unique, nature has left its mark in the form of weathering. No one can say exactly where the wood comes from and how long it has been on the shore. It is precisely these characteristics that make driftwood something very special. And best of all, if you want to process the unique pieces, you can make unique upcycling items from them.
How to use driftwood for craft projects: drying and storage
If you come across washed-up wood near the water, it is still wet in most cases – or lies directly in the water. In order to process it properly, you should first let the driftwood dry properly.
Important for the drying of driftwood: Like any wood, it is an organic material that deforms over time. If too much moisture is removed from the material by direct sunlight or on the heating, cracks can occur and it becomes brittle and fragmented.
From the outside it is not clear at first whether the wood in the core is still wet. Therefore, you should lay out the pieces a little longer for drying, preferably a few days at room temperature on newsprint. The cellar is not a suitable place for this, because the humidity is too high there. With completely soaked wood, this process can take a few weeks.
Of course, it also depends on the size of the driftwood piece: thick tree trunks or large roots can take months to dry completely.
Cleaning driftwood for craft projects
If the found object is heavily covered with dirt, sand or algae, you should clean it with a coarse brush before further processing, but only after drying. After that, you can also remove pieces of cindens that have dissolved. Do not wipe with a damp cloth, otherwise the wood will absorb water again.
How can driftwood be processed?
When working with driftwood there are no limits to the imagination. You can work it with sandpaper or a wooden rasp, carve with the chisel, cut with the fine saw, screw, connect with wire, embellish with paints or just treat it with wood oil, so that the character can be even better seen.
Here we have collected some DIY ideas for driftwood:
1. Picture frames made of driftwood
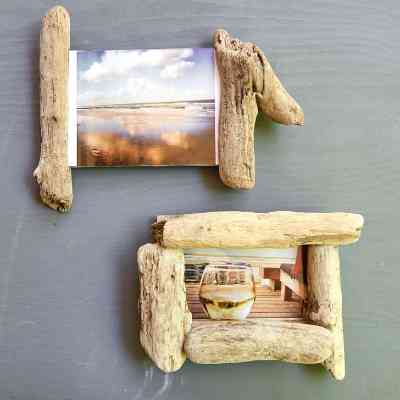
With just a few simple steps, you can mount driftwood pieces on to an existing picture frame, for example with nails or wood glue. This way you get stylish placeholders for your holiday memories!
2. Seat made of driftwood
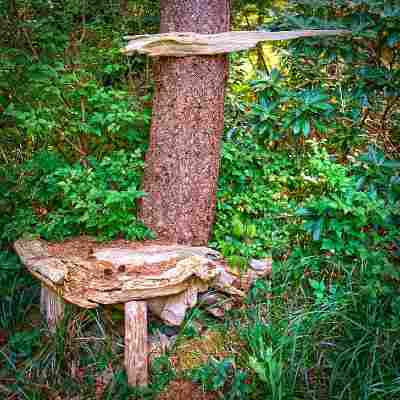
A large piece of driftwood can also be a sitting option in itself. Connect several parts to a natural seat in the green!
3. Sculptures with driftwood
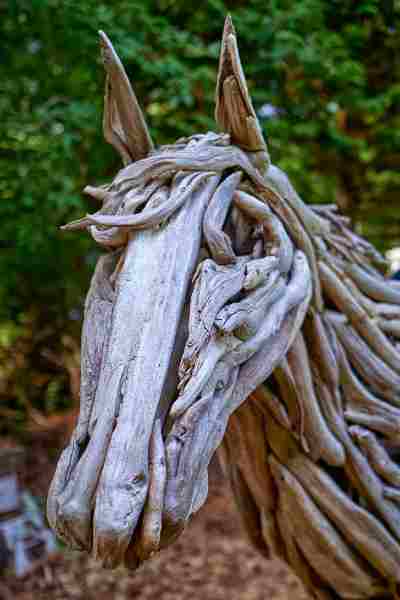
Making sculptures from driftwood is definitely more demanding. In addition, a large amount of branches, trunks or roots are required for this. Often the wooden parts also give a rough artistic direction and can serve as an inspiration. Let your imagination run wild!
Try some of our other great craft projects to do with your children.