


Ivy is a climbing plant that works its way up wherever it finds enough hold. This looks very nice on houses and protects the facade in addition to rain. But ivy, which grows in joints, can also damage the construction. Only one variety has cable ties instead of adhesive roots. Here is how to use artificial ivy in the garden.
Would you have realized that this is the ivy genus Hedera helix iniuriam, the false ivy? The square ivy panels made of plastic are so deceptively real, that one notices the “fraud” really only on the last meter – and then only if you look very carefully!
One wonders why one should hang plastic imitations on his house or on the carport … We did it first for fun trying out what you can do with this material so everything. But also discovered a good reason to use the imitation: avoid building damage!
Why use artificial ivy in the garden
Structural damage from ivy and other climbing plants is a polarizing issue. On the one hand ivy on the house facade is beautiful, on the other hand one has to reach deep into the wallet when the sticky roots of the ivy have transported water into the house wall.
These dangerous plants are ivy, climbing hydrangea, some climbing trumpets, wild wine. Remains of such adhesive organs sometimes lead to construction defects or even damage.
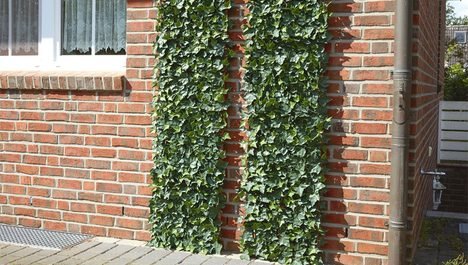
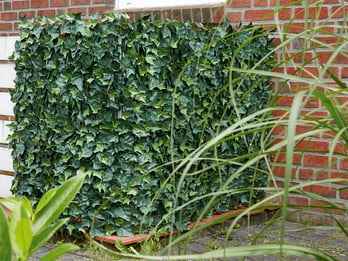
We have found various locations for the artificial ivy and how well it can be mounted and if one sees a difference to the natural ivy: as an accent on the house with the self-made wooden trellis, as privacy mats on a wire fence and as disguise of unattractive areas such as gray carports or green outward woods. After all, false was scarcely distinguishable from real ivy for the uninitiated.
Dress up the stairs
Step 1/3: Old basement staircase
This basement staircase already looked very weathered. With the ivy panels, it wil improve.
Step 2/3: Extend panels

The panels can be extended in height and width by the fasteners. As with an arrowhead, the thorn has a barb, so that the connection cannot loosen.
Step 3/3: Hidden basement staircase
With our ivy, the basement staircase is again suitable for gardening.Next
The wooden frame
Step 1/5: Measure and cut

Planed frame woods are sawn with a fine saw and a cutting load.
Step 2/5: Assemble frames
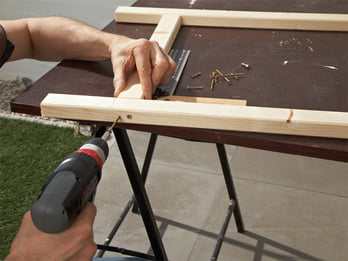
Assemble the components bluntly with screws to the frame.
Step 3/5: Screw on the middle bar
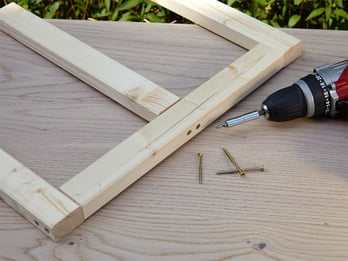
Don’t forget the middle bridge! This prevents the panels from bending.
Step 4/5: Drilling holes
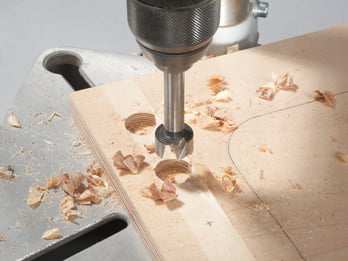
Each panel drills two holes four times to perform the cable ties.
Step 5/5: Paint wood
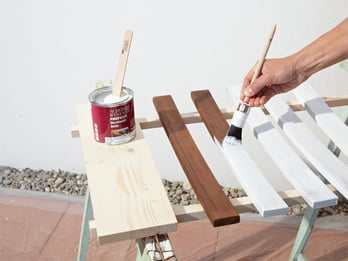
Then paint the wood. It is best to use a 2in1 lacquer (primer and varnish in a product) or weatherproof paint.Next
Fix with cable ties
Step 1/3: Thread cable ties
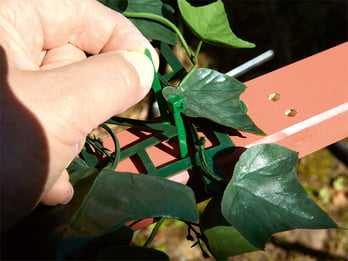
Thread the cable tie into the boreholes so that the eyelet is at the top.
Step 2/3: Tighten the cable ties
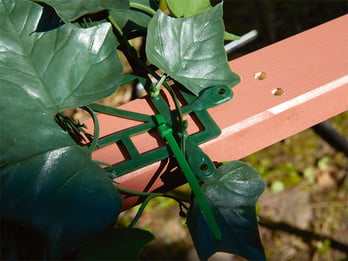
Then tighten so that the panel can no longer move.
Step 3/3: Cut off cable ties
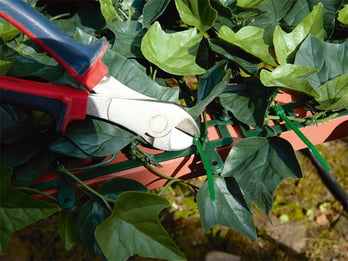
The protruding end of the cable tie is cut just behind the eyelet. The easiest way is to use a side cutter.
Fixing the panels to the wall
Step 1/3: Screw in ring screws

The simplest way to attach the ivy panels to a shed or carport is certainly those with wooden screws – they should be made of stainless steel. Simply use the connecting eyelets of the panels and screw the screws in. However, if you don’t want to “hole” your carport with screws, do it like this: Screw in the ring screws at a distance of 70-80 cm.
Step 2/3: Insert aluminium tube
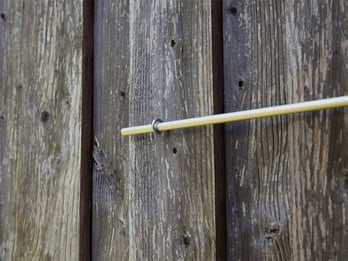
Insert a correspondingly long aluminium tube.
Step 3/3: Attach ivy panels
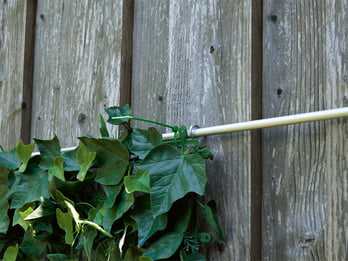
Attach ivy panels with cable ties to the aluminium tube.
 Gerhardt Richter is a writer and a trainer at trade technical colleges, specializing in carpentry, plumbing, mechanics and construction.