
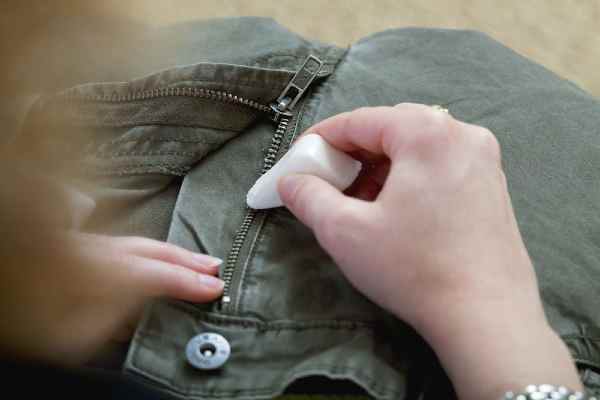
Our guide explains how to fix a zipper, including how to fix a broken zipper or one that is stuck or separated.
Find more guides to aid your wardrobe in our fashion section.
Our tips and tricks solve the problem in a few minutes when you need to know how to fix a zipper.
What to do if the zipper is stuck and just doesn’t want to open? Whether jackets, bags or trousers, if these can no longer be opened or closed, this is not only annoying, but sometimes also very uncomfortable. Do you really need a new zipper immediately or are there any home remedies that can help?
If a zipper is stuck, it is important to keep calm. Because if you forcefully pull on the hooked zipper, you will probably only make the whole situation worse. The zipper can then no longer be opened at all or it is damaged in such a way that it can no longer be closed. Then of course the zipper is no longer usable and must be replaced with a new zipper. This is associated with corresponding costs or effort.
How to fix a zipper that is stuck: first find the cause
Before you try to get the zipper back into gear with various tricks, the cause must be found.
Problem: A piece of fabric got stuck in the zipper
Solution 1: The piece of fabric can usually be easily removed from the zipper by gently pulling on the fabric. Alternatively, the zipper can be gently pulled down at the point where it sticks to free the piece of fabric. This usually works quite well.
Solution 2: If there is the possibility of taking off the garment with the closed, hooked zipper, this is ideal. So the garment can be easily turned inside out. A careful look at the zipper now provides information about the problem at hand. Turned inside a small piece of fabric for example with tweezers from the zipper to be freed . However, you should not move the zipper yourself.
Solution 3: Only if this did not work, you have to move the zipper towards the pinched piece of fabric. At the same time, it makes sense to apply a constant, yet gentle pull on the piece of fabric. As a rule, a few attempts are sufficient to fix a jammed zipper.
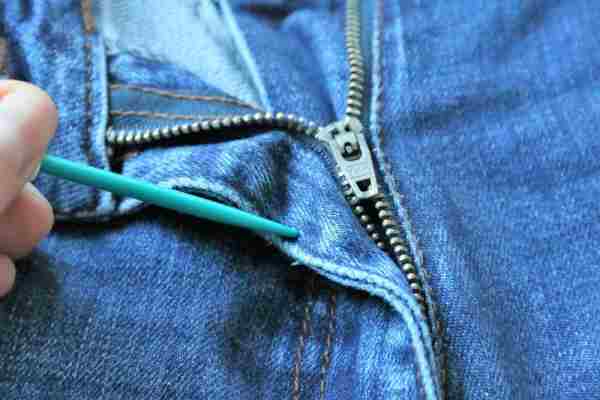
Solution 4: the 10-step method
- Pull the slide all the way down or – if it’s easier – all the way up.
- If that is not possible because some fabric is trapped in the zipper, leave it where it is for now.
- The pencil’s graphite is used as a lubricant to make roughened zipper teeth smoother.
- Above all, rub over the problem areas where the slide usually gets stuck. Don’t forget the back.
- You can also rub the entire length of the zipper and make it smoother again.
- If fabric is caught in the carriage and it does not move, work around it with the pencil. Rub the zipper over and under the sled as best you can.
- Now gently shake left and right to remove the fabric.
- If you rub some graphite into the fabric, it may be easier to get the sled free.
- Once the whole slide has been rubbed with graphite, slowly pull it up from the bottom.
- Pay attention to the places where you feel resistance and rub them again with graphite.
- If the graphite doesn’t help, you can try other lubricants.
- In general, inconspicuous fats work very well. Try soap or candle wax.
- Sometimes several applications are necessary before the slide runs properly again.
Problem: Teeth on the zipper are crooked or broken
A piece of fabric is not always the cause of a jammed zipper. The teeth of the zipper may have worn out over time and have simply become blunt. Perhaps the teeth no longer fit exactly into one another, but have tilted a little crookedly. In this case, home remedies can be a good help.
In these situations, the use of a lubricant is beneficial to fix a jammed zipper. With this simple home remedy, the jamming zipper works perfectly again in no time. As the list below shows, there is a wide range of options in this situation. The best thing is that many of these remedies are already available in most households.
- Solution 1: Rub the teeth of the zipper with a pencil so that the graphite from the pencil makes the zipper supple again.
- Solution 2: Use soap in the way just described.
- Solution 3: Use candle wax / paraffin to lubricate the zipper.
- Solution 4: Alternatively, beeswax can also be used as already described.
Repair your zipper’s teeth
Sometimes the problem is in the details, and it is individual worn teeth that interfere with the zipper. These then no longer interlock properly and prevent the zipper from closing properly.
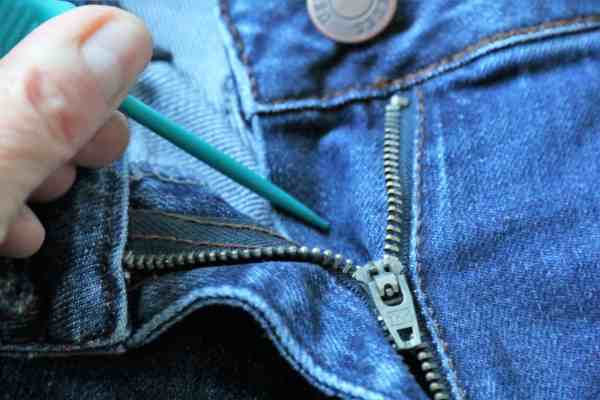
- Another problem can be that individual teeth are already very roughened. So again use a pencil or some other lubricant to smooth these teeth.
- Run the pencil over the inside and outside of the zipper and then slowly pull it open and close. Pay attention to the places where the teeth do not grip.
- If you find that individual teeth are bent, you can carefully straighten them with needle-nose pliers.
- Use the surrounding teeth as a guide and do not be too rough so as not to break them off.
- Also, make sure you only grab one tooth at a time. If you do not use needle-nose pliers, there is a high risk of working on several at the same time and thus further deforming them.
- If you notice that the problem is the entire length of the zipper, it is likely that the problem is not the teeth, but the slide. This can expand over time and then no longer bring the teeth together properly.
- In this case you can use pliers to compress the slide a little on both sides.
- Do this gently and be careful not to deform the slide too much. In the worst case, it will otherwise be too tight and you can no longer pull it.
Realign zipper teeth
- In this case, you will need to remove the end piece of your zipper to realign one side.
- You should only do this if the zipper is open and the end piece is easy to remove.
- Bend the end piece open with pliers and remove it.
- Open the zipper by pulling the slide all the way down. Make sure that the slide does not leave the zip
- Now align the two rows of teeth with each other.
- Slowly push the sled up a little to test and stabilize the realignment.
- Now attach a new end piece so that the slide doesn’t fall out of the zipper at some point.
- To do this, you can attach a piece of fabric to each side with a few stitches.
Which home remedy is ideal also depends on the respective type and color of textile. For light textiles, it is inconvenient to use a pencil to repair the zipper. Because that would cause unsightly stains. Soap has proven itself for most textiles, since it can be washed out easily. Wax residues are the hardest to remove, so the solution should only be used when everyone else is no longer helping.
How to fix a zipper: more solutions
Problem: Zipper opens automatically on its own
A stuck zipper is not the only problem that can arise with this practical locking mechanism. Rather, there are zippers that open again and again unintentionally by themselves. This can become a real problem, especially with trousers.
Solution: Here it makes sense to attach a key ring or a small loop to the slide of the zipper. Then put the key ring or the loop over the trouser button so that the zipper can no longer open unintentionally.
Problem: How to fix zippers that separate
It can also happen that the zipper opens by itself from below – often with jackets. This is mostly due to the clip that is at the bottom of the zipper. Perhaps it has simply opened too much.
Solution: This problem can usually be eliminated by lightly pressing the zipper clip with pliers. It is important to exercise caution so that the clip is not irreparably damaged.
How to fix a broken zipper
Broken zippers are a major nuisance – especially when it happens to a favorite piece of clothing. Often the zipper can no longer be repaired easily or has to be replaced entirely. But then there is the problem that the new fastener may no longer fit the item of clothing one hundred percent. Because of this, you’re always grateful for helpful tips – even a celebrity like Ryan Reynolds.
Ryan Reynolds loves life hack that saves broken zippers
The “Deadpool” actor shared a video on his Twitter account about a life hack that he discovered: In it, a person explains how to repair a broken zipper. The initial situation is that the slider has completely broken away from the zipper or has fallen away.
The slider must then be pushed onto the two middle prongs of a fork. The zipper straps are then pushed back into the slider with the teeth on both sides. This can then be pushed back on the belt as normal. Watch the video he shared.
But does this really work? However, many commenters on the video did not miss the fact that the method does not completely fix the zip problem. One user writes: “The trick brings the slider back onto the zipper, but it doesn’t fix it. It can be pushed back down or the zipper opens from below.” This is because the end part of the breech does not stop the slide.
The last resort: replace the zipper
If the above-mentioned home remedies could not lead to the desired success, the zipper must ultimately be replaced. You can do this yourself with a decent sewing machine. However, there are also items of clothing in which the zipper has been sewn in particularly complicatedly.
In these cases, as well as whenever the necessary sewing machine knowledge is not available, it is advisable to go to a tailoring shop. This can sew a plastic or metal zipper into the garment.
Zippers made of plastic are mostly used for children’s clothing, since the risk of injury is correspondingly lower compared to metal zippers.
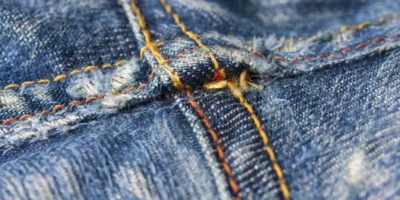
How to fix jeans zipper problems
Occasionally – and especially in very inappropriate moments, it happens: the jeans zipper breaks. Disposing of the jeans is not an option. Taking it to the seamstress is expensive! How about if you could easily replace it yourself with our steps for how to fix jeans zipper.
Required accessories for how to fix zipper on jeans
- Jeans zip
- Jeans needle
- Jeans sewing thread
- Wondertape
- Pins
- Seam ripper
- lint roller
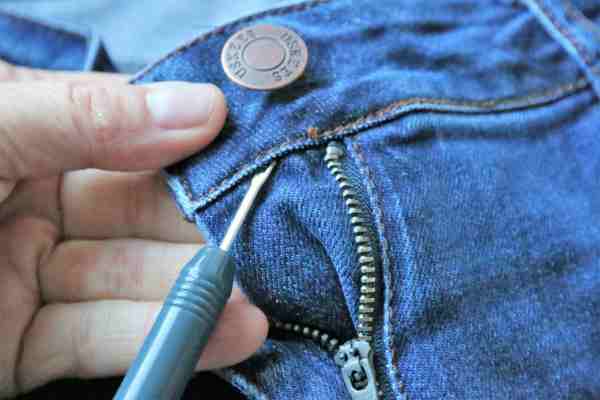
- anatomical forceps
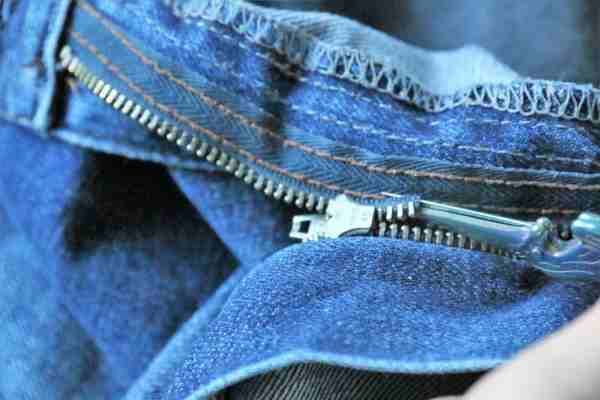
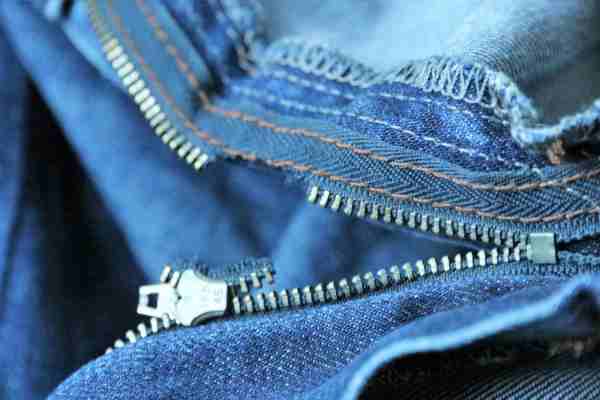
The anatomy of a jeans zipper
The piece of fabric that lies on top of the zipper is called the overlay.
The piece of fabric that lies under the zipper is called the underlap.
So you always know what I’m talking about in my instructions. And learned a few more sewing vocabulary right away. 😉
Remove the zipper
Start by using the seam ripper to separate the waistband seam. Open the seam about 2 cm to each side of the zipper.
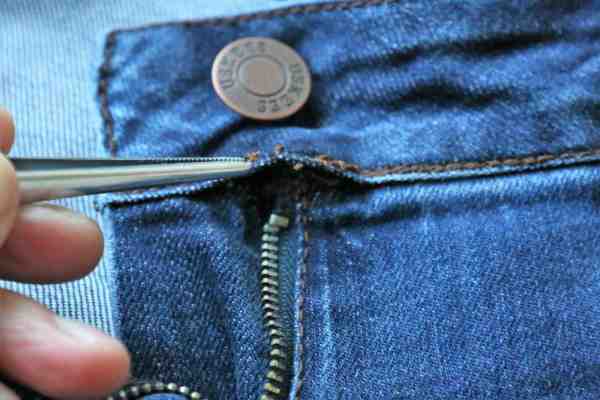
Repeat this step for the other side as well. And if your zipper also got stuck in the middle, you should open it. To do this, simply separate the teeth on one side of the zipper.
But be careful: Do not cut into metal – that will make your scissors blunt! 🙂
Now you can pull out the zipper completely. Open the rounded line of stitching at the bottom of the zipper as well.
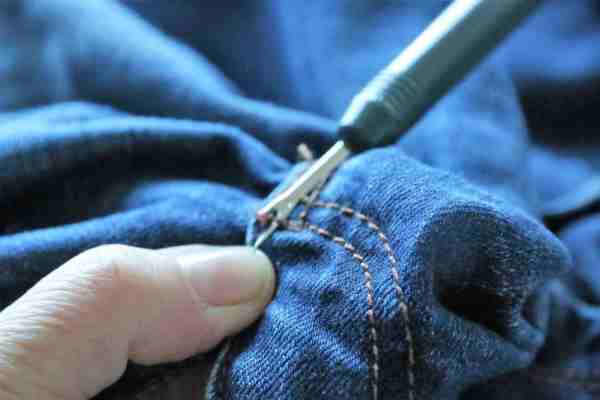
Important: Thoroughly remove all thread remnants! The thread remnants can be removed very easily with a lint roller.
Also open the small topstitching seams that hold the over and underlap together:

Are all seams unraveled, all lint removed? Then it’s time to sew in the new zipper!
Instructions: Sew in zipper
Use a pin to pin the overlap and underlap together from the right approx. 1 cm below the rounded seam. So nothing can move during the subsequent sewing. Pin the lower end of the zipper to the flap – exactly where the old zipper was.
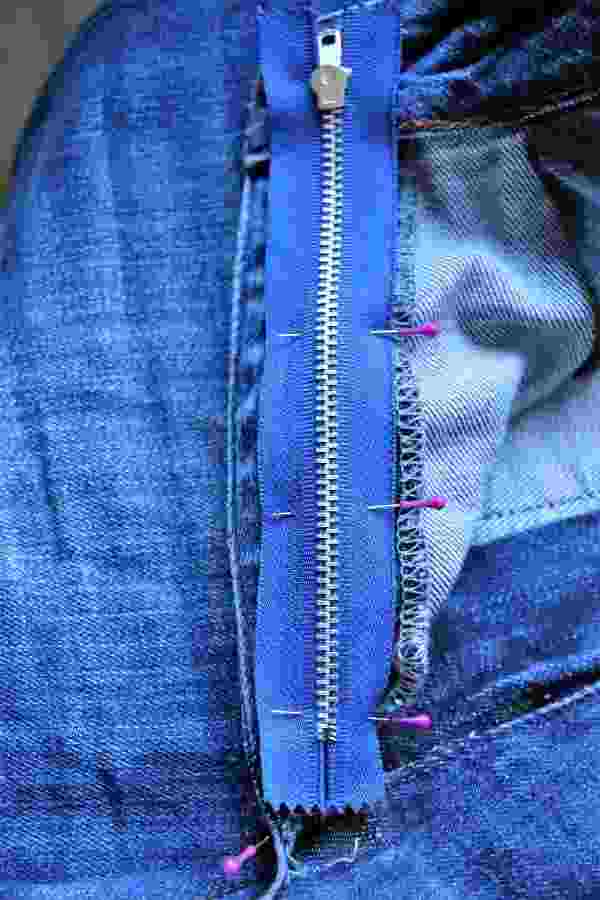
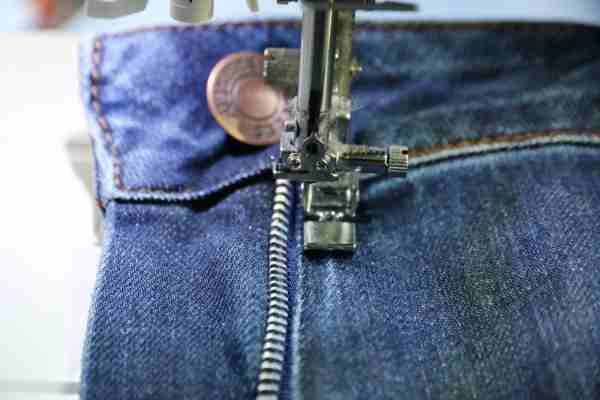
Sew the zipper on with a straight stitch 2-3 mm from the zipper teeth. It is best to use the zipper foot of your sewing machine and a sewing thread that matches the color of the pants. When positioning the zipper on the underflap, you can work with wonder tape if you find it is easier to use than pins. Press the fabric firmly onto the wondertape.

And also sew the underflap with a straight stitch at a distance of 2 – 3 mm from the zipper teeth.
Tuck the upper ends of the zipper into the waistband and secure them with sewing.
If the zipper is too long, you can shorten it. 2 centimeters of the zipper should be in the seam. Remove the extra teeth before you position the zipper in the waistband.
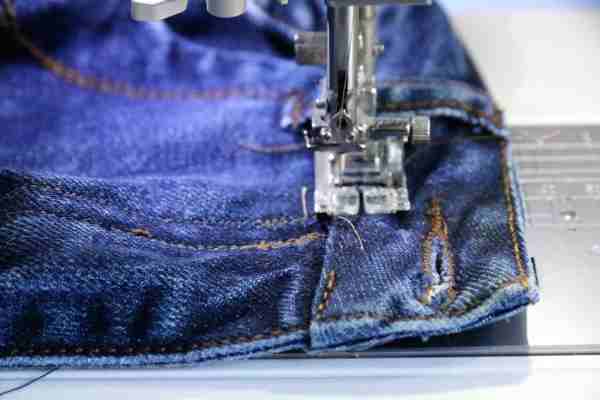
Finally, sew the sides by laying them on top of each other exactly as they were in the original.
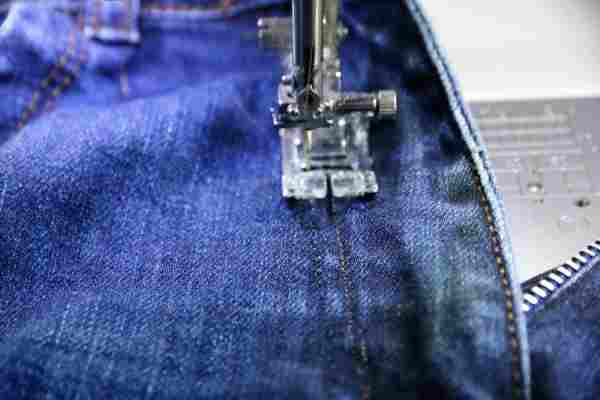
Do the decorative seams from the right with a straight stitch. Before doing this, make sure to check again whether all layers are in the correct position. If this is difficult for you, a little wonder tape will help here too. 😉

Done!
 Genevieve Dumas is a design, fashion, food and style writer who has worked on major magazines and mastheads in the United States and Europe.