


They are shabby, they are ugly, and they are hard to get down: Old tiles can really be a thorn in the self-maker’s eye! We’ll show you how to make them disappear quickly and cleanly. Learn how to cover old tiles with parquet and special effects.
Tiles are handy. They are extremely easy to care for, enormously hard and above all (in the right execution) absolutely waterproof. Of course, the latter is especially important when it comes to the materials with which you want to conceal your old tiles. While it is relatively easy in the kitchen to make the tiles disappear with a matching cladding, it gets a bit more difficult in the bathroom, which is where it is handy to cover old tiles.
As a rule, the tiled surfaces around the tub and washbasin are larger and naturally exposed to a much larger amount of water, which is referred to in professional circles as “spray area”. So the sheets, foils and fillers that you place in front of the tiles must either be waterproof per se, or you must do so with a proper after-treatment before you cover old tiles.
By the way: Very often, much more wall surface is tiled than would be necessary after the actual spray area. With your lamination, you can therefore go smaller.
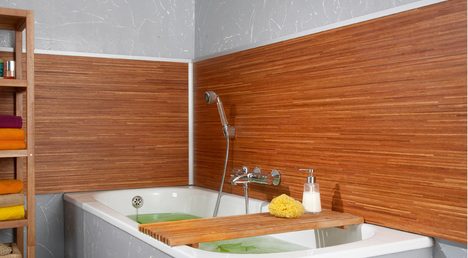
For the combined surface in the picture above you need a putty and a few planks of a sealed multi-layer parquet.
Parquet on the wall
The icing on the cake is our idea with a multi-layer parquet slab . Here you have to take two precautions to avoid having to deliver the wood helplessly to the water attacks: The click edges of the planks must each be provided with a full strand of waterproof glue, so that it swells out when you click into each other along its entire length. Here you have to wipe it off with a damp cloth. This glue in the plank joint seals the joints against penetrating water.
Then you should once seal the whole plate with a synthetic resin paint. The lower edge of the panel is at least 5 mm above the tub and is bevelled to 45 ° – this creates an ideal drip edge.
Laminate tiles with parquet
After glueing and clicking the planks, turn the platen to the visible side. Glue and screw on three support strips. The two outer ones turn one screw-in eyelet into the edge.
Use filler for a marble effect
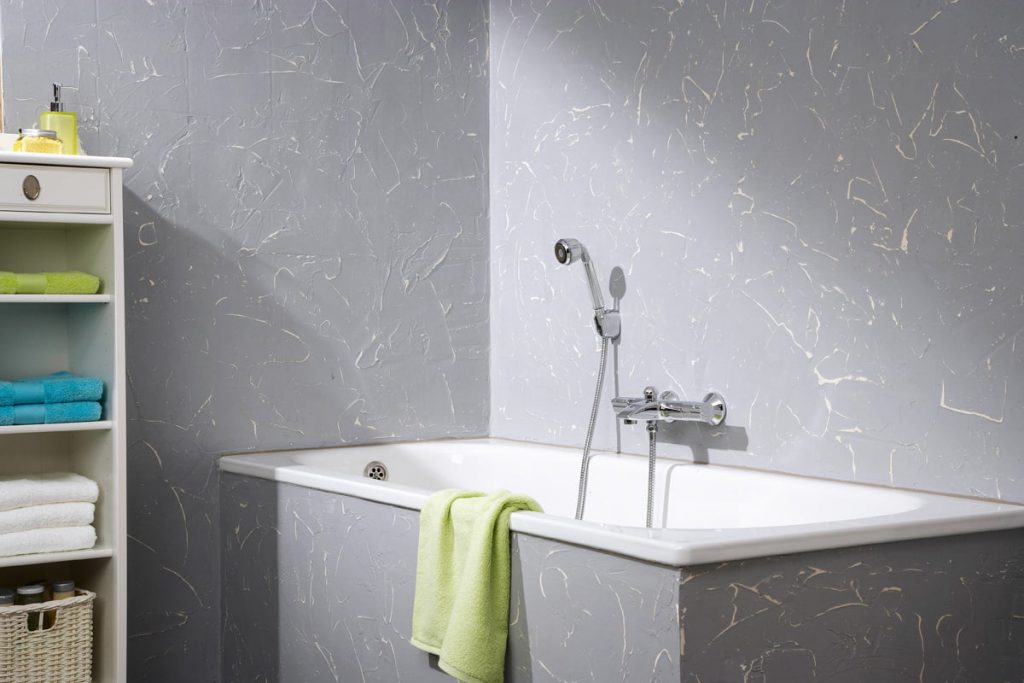
If the real marble bathroom is unaffordable, a marble-effect wall can be the replacement. The best part: Instead of expensive special products you can use a filler that is otherwise found in the joints of plasterboard walls. You should not neglect using the special (and therefore more expensive) tile primer. Conventional primers may not, as intended, be adhesion-promoting, but even act as a release layer between tile and filler.
The seal of the applied layer is applied to two coats of acrylic varnish : the first after drying the putty in the desired color, the second as a clear varnish after sanding the surface. Incidentally, this sanding creates the marble effect in the first place. In fact, the burrs created during the process of drawing up the mass are removed and the white base color of the putty compound reappears. The transitions from a leveled wall to a ceramic tile must seal you permanently elastic, despite all Mediterranean flair. Use a mold-resistant brand silicone for this purpose .
 Gerhardt Richter is a writer and a trainer at trade technical colleges, specializing in carpentry, plumbing, mechanics and construction.