


The large garbage cans in front of the house are usually not a nice sight. And despite all the recycling efforts, no household can do without a residual waste bin. With our practical guide you can build a garbage can box, and keep the can hidden.
At least one garbage can is located in each of us somewhere in a niche next to the house entrance or garage. And they’re just not nice to look at. It is a good idea to build a garbage can box in which the tons can be hidden.
How to make a garbage can planter box
Kits from the DIY store
In DIY stores there are a number of kits for small housings or boxeswhere your garbage cans disappear. These are made of metal or wood, simple screens made of bamboo or reeds can also be used. However, the advantage of a home-made hiding place is obvious: you can place it exactly in the right place in the right size for you and also visually adapt it to the house or garage. After all, if you add recyclables, organic and paper waste, a colourful mix of blue, brown, yellow and black plastic containers is available in the front yard, all of which must be accommodated.
We opted for the straight-line construction with some colour and console roof. This fits perfectly into the niche and integrates very well into the look of the house.
You need these materials for the garbage can box
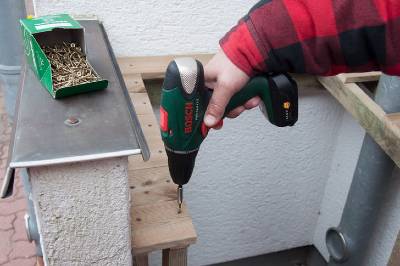
- Tool: Circular saw, (battery) drill, hammer, water scale, hot air blower, hand tacker, cutter, inch stick
- Colour: Wood preserving varnish; here: Coloured lacquer in grey and semi-gloss
- Building materials: wooden strips, KDI boards, roof waterproofing, Spax screws, 2 angles, 4 hinges, sliding bars, gas spring
- Cost: about $200
Standard sizes of garbage cans
Most households can cope with a residual waste bin of 80 or 120 litres. We designed our box for these sizes. The smaller 60-litre tonne fits easily, for 240 litres it gets a bit tight in the shelter.
Build your own tailor-made garbage can box
Large or small: For several garbage containers or as additional storage space for, for example, (garden) appliances, you can expand our box modularly. Depending on the space conditions, arrange the modules side or one after the other. Our measurements are for reference only and are designed for an 80-litre tonne. Of course, the box can also become taller, wider or narrower.
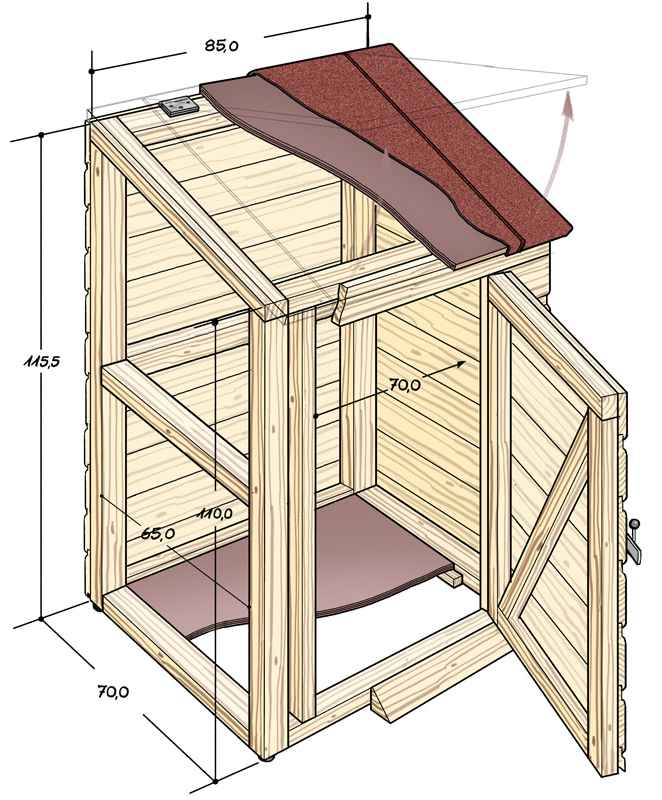
Build a garbage can box: instructions
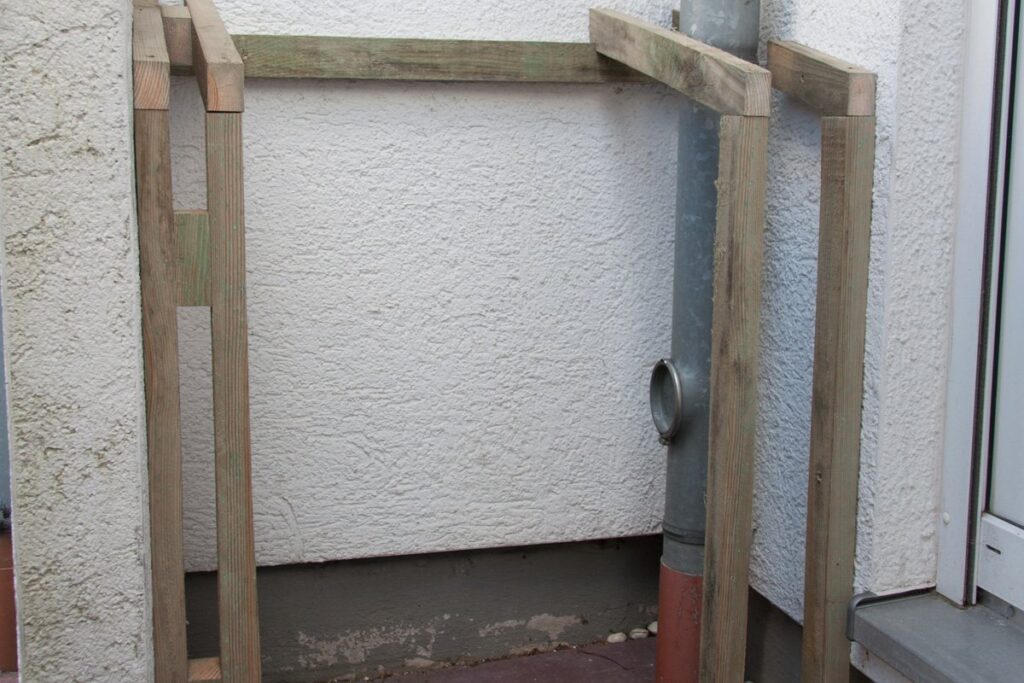
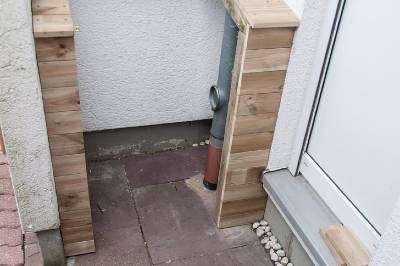
The wall niche is the ideal place for our garbage can box. The installation of the scaffolding is very easy here.
The wall niche next to the front door is in our case the ideal place for the garbage can box. All that was missing was a roof and a front. Both should be easily opened.

First, measure the width of the niche so that you can saw the support strip for the frame construction.
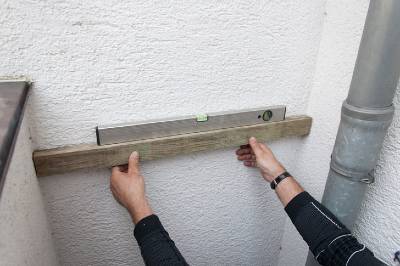
To position the carrying strip horizontally on the wall, align it with a water scale.

Turning You now screw through pre-drilled holes in the latte and mark the later holes with the hammer on the wall.
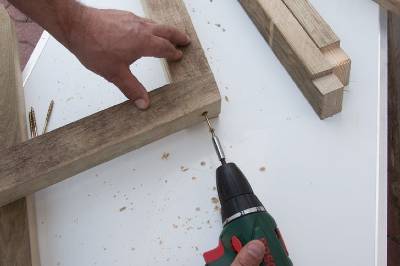
For the frame, drill holes and then screw them together in the desired length and inclination (approx. 15 degrees).

The resulting supports are fixed to the other carrier and to the walls. Now the basic structure is ready.
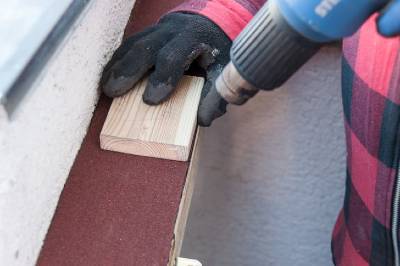
Cutting For this purpose, you use a circular saw to add KDI boards (garden wood) to the correct length and then screw them onto the scaffolding.

It is important for planking that you start with a continuous board. Because here the hinges are later fixed.
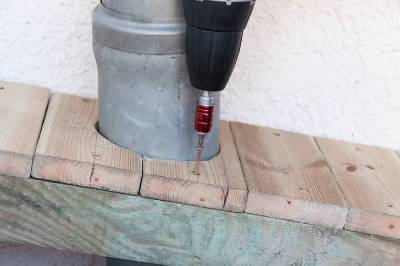
You can overcome obstacles, such as a rain pipe, with the help of a stencil. This allows you to cut out the cut-out without any problems.
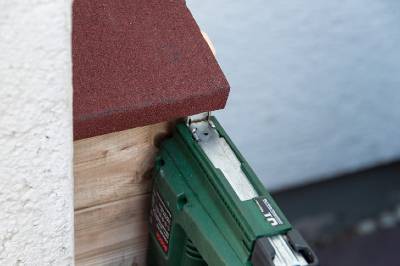
For the lid, mount an angle on each side of the supports. These are the support points of the lid.
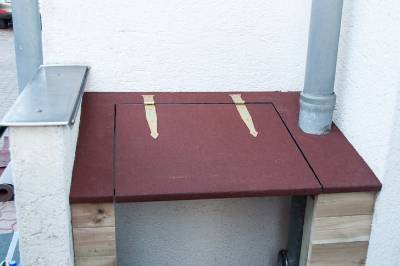
Our handsome garbage can box is about to be completed. All that is missing is the paintwork, the roof and the door, which we have equipped with a little helper.
Easy handling of the box is important, after all, the ton must be moved every week. The flap in the roof provides quick access. With the closures everything becomes storm-proof.
Extra tip: To ensure that the garbage can box does not make everyday life even more difficult, we have provided the flap with a gas spring. It can be opened without much effort and stays on top if you want to throw something in.
Dress up the top with roofing insulation material. By heating with a hot air blower you get the necessary adhesive.
Knock over the roofing board at the front edges and then attach it to the bottom with a tacker.
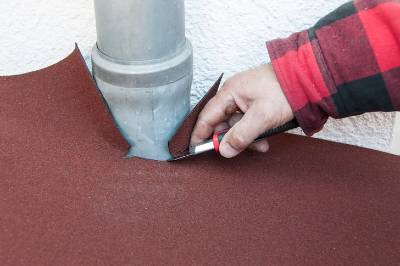
On the rain pipe, adjust the roofing board with a cutter. Rather, slow down before cutting out too much.
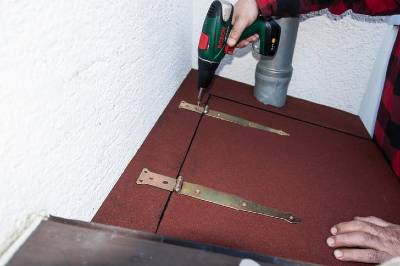
Once the lid is finished and covered with roofing board, you can screw it with hinges.
You get more stability for the lid by underlining it. For this purpose, screw an additional board in the support frame.
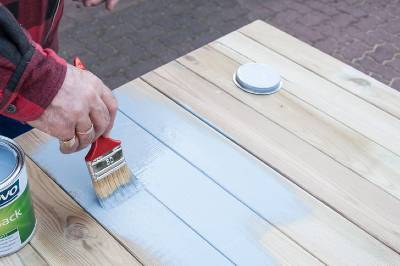
The front of the cladding is painted with either wood protective lacquer or a glaze, as desired.
Like the lid, the door consists of a support frame and a planking.
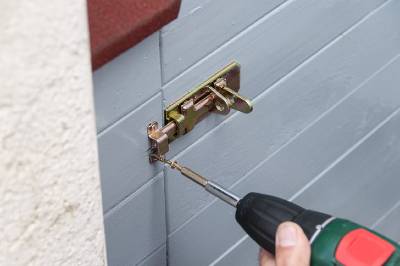
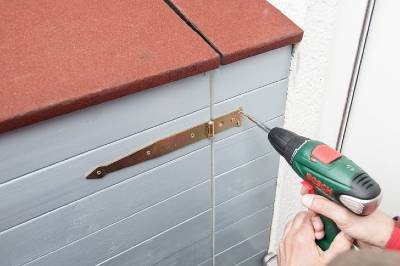
After applying the roofing board and painting, fix it with hinges and a sliding latch.
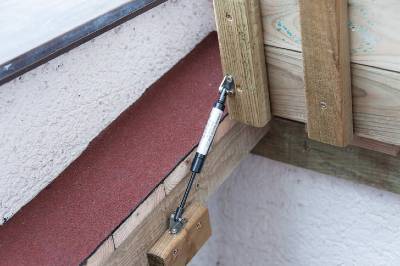
Finally, for easier opening, attach a gas spring to the frame of the lid.
Find more great home and garden projects in our Carpentry, Home and Garden sections.
 Gerhardt Richter is a writer and a trainer at trade technical colleges, specializing in carpentry, plumbing, mechanics and construction.