


Root cellars and earth cellars are a great way to store vegetables and fruit. Our guide shows how to build a root cellar for the backyard from a washing machine drum.
Find more garden guides, tips and advice
Find more carpentry project guides, tips and advice
If you are facing a big harvest in your garden, you might be wondering what to do with potatoes, apples and carrots that are not eaten soon. Because not everyone has a cool basement that is suitable for winter storage. No problem – we will show you how to build a root cellar out of an old washing machine drum! In this way, especially in allotment gardens, fruit and vegetables can be stored cool and frost-free without a cellar and protected from mice and other small animals.
In the summer months you can even protect drinks and food from heat in this “earth-free refrigerator without electricity” and serve them slightly chilled.
How to build a root cellar from a washing machine drum
An underground storage area, also known as the root cellar or earth cellar, ensures that fruit and vegetables stay fresh for months. In the past, shallow trenches were dug every year, filled with potatoes, beets or cabbages, and several layers of earth and straw were piled up over them in such a way that pests, frost and moisture were effectively kept away.
If you want to have an earth root cellar in your garden today, you can also use an old washing machine drum or dryer drum that is only buried once and can be used again and again.
How to build a root cellar: Required materials

- Washing machine or dryer drum made of stainless steel (e.g. ask at the recycling yard or scrap yard)
- 2 wooden panels about 2 cm thick, one as wide and deep as the opening of the drum and one 3-4 cm larger (here 36 x 36 cm and 40 x 40 cm)
- 1 piece of styrofoam, approx. 3 cm thick and the same size as the drum opening or several layers of corrugated cardboard of the same size
- 4 wood screws, 6 cm long
- 1 weatherproof furniture handle with matching screws, alternatively 1 piece of roof batten about 25 cm long, 24 x 48 mm thick, and two more wood screws, 6 cm long
- Shovel and spade
- wheelbarrow
- drill
- saw
- sandpaper
- folding rule
- pencil
- about 50 liters of sand or gravel (about a wheelbarrow)
- Time required: 3 hours.
Steps to build the project
Choose a suitable place
First choose a place for the earth cellar. A level or slightly elevated, if possible partially shaded or shaded place is suitable. The groundwater table should also be lower than the pit to be dug (70 centimeters or more below the bottom of the root cellar at least ).
Dig a pit
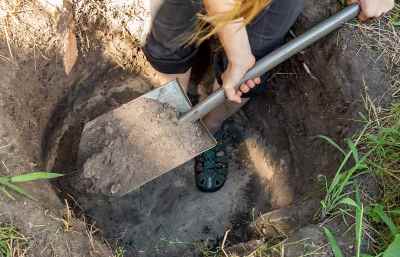
Place the washing machine drum in the desired location with the opening facing up. Cut the ground around ten centimeters away with a spade to mark the size of the pit. Then put the drum aside and dig the hole about ten centimeters deeper than the metal cylinder is high. The best way to check the depth is by placing the drum in the pit on a trial basis.
Fill the drainage layer into the pit

Fill the completed pit about ten centimeters high with sand or gravel and place the washing machine drum in it so that its upper edge is level with the surface of the earth. The sand ensures that rainwater does not accumulate and run into the drum, but rather flows away.
Fill the edge of the pit

Also fill the gap between the finally placed drum and the pit wall with sand and step on it. A dryer drum usually has no holes on the sides, so that in this case part of the excavation can also be used.
Make the lid

An insulating cover is required so that the earth cellar is well protected from air frost and rain. To do this, saw out two circles from the two wooden boards – one slightly smaller than the opening of the washing machine drum (here 36 centimeters in diameter) and one with a diameter about three to four centimeters larger (40 centimeters in diameter).
Insulate the lid

Glue a layer of styrofoam or corrugated cardboard about three centimeters thick between the two cover plates. To do this, cut styrofoam or several layers of cardboard to the size of the smaller wooden circle and glue it between the wooden panels so that the larger panel protrudes evenly on all sides. In addition, screw the lower plate to the upper plate with four screws through the insulating layer.It is best to give the wooden lid a protective coating so that it can withstand the weather better. The earth cellar is now ready for use as winter storage!
Add the handle

Smooth the saw edges with sandpaper. Screw the furniture handle to the larger of the two wooden panels. Alternatively, saw off two pieces about 2.5 cm long from the batten and smooth the sawed edges of all parts with sandpaper. Fasten the long piece of the lath as a handle with the short sections as spacers to the lid with two screws on the wooden plate. Then seal the lid with varnish against the weather.
Fill the earth cellar
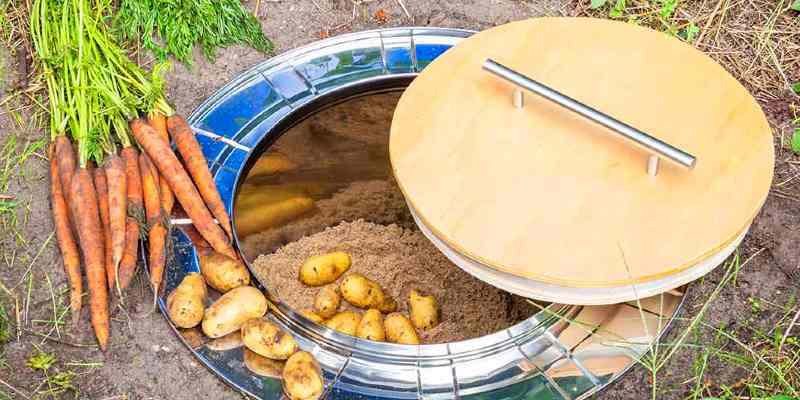
The earth root cellar is particularly suitable for root and tuber vegetables such as carrots, potatoes, kohlrabi and beetroot. Do not wash fruits and vegetables before storing, but remove leaves and stems so that they do not remove moisture from the fruits. Storable apples that are harvested barely ripe can also be stored in the underground storage facility.
Soft fruits and vegetables that rot quickly, on the other hand, are not for the earth cellar. Only flawless fruit should be used for storage, as a single rotten potato or apple with a bruise can spoil the entire supply.
To prevent fruit and vegetables from losing moisture, cover the bottom of the drum with a little sand before the first layer of fruit follows. Then alternately layer sand and other fruit and vegetables. It is best to store potatoes as low as possible, as they are relatively sensitive to frost and the temperature at the bottom of the drum is the most balanced.
Stuff the almost full drum loosely up to the lid with dry leaves, straw, hay or even bubble wrap as frost protection, then put the lid on. In addition, it is advisable to cover the lid and base around the drum with leaves or coniferous branches. If you gradually remove parts of the contents of the drum, it is best to fill the resulting air space with more insulating material such as straw or hay.
Tip: In summer you can also use the earth cellar to cool drinks or other food without electricity, for example: The temperature at the bottom of the earth cellar is far below the air temperature. However, beer and soda don’t get as cold as out of the fridge .
 Gerhardt Richter is a writer and a trainer at trade technical colleges, specializing in carpentry, plumbing, mechanics and construction.