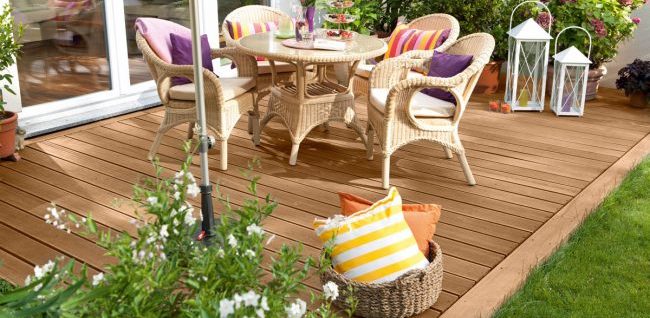


Real wood terraces have style and charm. So you can watch over time as the wood changes under the influence of the weather and sets a patina. Therefore, there are some important things to consider when you build a wood terrace deck.
The right tools for terrace construction
Precise tools, especially a miter saw , are needed to cut the planks clean. An inaccurate cut is otherwise just in the edge area to optical disaster.
How to build a wooden deck with louvred roof
Derivation of rainwater
The most frequent and most serious faults in terrace construction happen regularly when the rainwater is discharged . It always comes to problems when after heavy rainfall, the surface of the wooden deck dries, but the substructure stands unnoticed in a puddle. If this happens too often, the wood bums away from below.
Therefore, you should take the following principle into consideration when planning your new terrace for the first time: Lay the leveling layer from the start with a slight slope leading away from the house . If you do not do this or if you build the terrace with a slope towards the house, in a short time water will collect in front of the patio door, weaken the wood and eventually find a way into the house. Of course, this also applies if the planks of your deck run parallel to the house.
Build a wood terrace deck: Avoid mistakes
What to do under floorboards?
It is wrong to lay the floorboards exactly on a substructure wood, because this way the water can not run off (left). It is correct to use a second wood and to shift the impact between the wood so that the water can run off (right).
How to screw in screws?
Sinking the screw heads completely into the planks is wrong (left)! It is correct to screw in the screw heads flush with the surface (right). Do not lower the holes, but pre-drill in the screw diameter.
Break edges before screwing
When you build a wood terrace deck, you will find the wood planks often have ripped or chipped edges after sawing. These edges must be ground. To do this, use a belt sander with 80 grit sandpaper or an orbital sander with similar sanding paper. If you do not have one of these grinders, you can use an angle grinder. Carefully guide the grinding wheel over the edge!
What happens to cut edges?
Since the impregnation of treated wood only reaches a few millimeters deep into the wood, the cut edges must be after-treated before processing with a blue protection or a suitable wood preservative.
Build a wood terrace deck: Prepare the foundation
Align the guideline. The terrace upper edge is to run below the patio exit. Add up the thicknesses of the planks, the substructure timber and the concrete slabs, and then align the guideline accordingly. The guideline then shows you how high the leveling layer must be.
Towards the garden, line cords are positioned at the corners and the guide line is fastened with a slight incline (away from the house). Mark the height with a wax pencil to always be in control, even if the string shifts, such as by a person stumbling over it!
Apply the leveling layer (consisting of sand of grit 0/2 or 0/4) to the surface in accordance with the guideline height.
With a shaker (in the jargon vibration plate called) the entire surface is compacted. Such a shaker you rent day by day at a construction equipment rental.
If the leveling layer is compacted, check the height and, if necessary, layer some more sand.
With a long metal bar or a metal profile, the surface is then removed, resulting in a homogeneous surface with a corresponding slope.
Smaller bumps can also be compensated by means of a spirit level and a shovel full of sand.
Especially in the edge area and on the adjacent walls of the installation surface, it is difficult to work with the large metal profile.
Therefore, in this area, the substrate must be processed with a trowel.
In the next step, a garden mat is laid out over the entire terrace surface, which gives plants no chance to grow through.
Last bumps highlighted by the garden fleece patch with laying sand.
Now the concrete slabs are laid out.
Laying the floorboards
Check the slope. When laying the paving slabs, once again check the required slope of 1.5 to 2%. If the slope is not yet reached, the supports are driven with a hammer with rubber cap (such caps are available for many different hammer sizes) in the sandy substructure.
The pavement slabs are laid according to the plank manufacturer at regular intervals.
In the next step, the round end bar is aligned on the pavement slabs. Here you have to expect, so that one lands with the last floorboard on the beam and not at the end of a floorboard has to be separated by length.
The framing is now made of planks on the round bars. To do this, set the miter saw to 45 ° and make a miter cut.
The framing must rest on both the outer beam and the first substructure lath.
Now follow all other substructure slats.
The planks are sawn and placed in position.
Spacer sticks keep the planks at a distance.
Drill the screw holes with a depth stop drill (prevents drill hole in the base plate).
Crooked planks are pulled straight with a tension belt.
This is how the finished corner of the terrace looks.
 Gerhardt Richter is a writer and a trainer at trade technical colleges, specializing in carpentry, plumbing, mechanics and construction.