


Gravel paths are a cheap and easy to produce alternative to paved and planted ones. On the one hand they do not seal the soil, on the other hand they need a little more care. We’ll show you how to create a gravel path properly.
How to build a garden path with stones
How to create a gravel path.
The production of a poured gravel path is not difficult and an appealing alternative to concrete or asphalt. In the design, round, organic shapes are possible and a variable path width.
Advantages and disadvantages of gravel paths in the garden
Gravel paths are easy to build and look natural. However, they are only partially suitable as transport routes: narrow tires such as bicycles or sack trucks can be difficult. The surface water simply seeps through the surface.
How much is a gravel path?
Calculate per square meter of gravel path $8.50 for lower and middle class plus lawn edge stones (50 cm long) at about $2. The surface gravel can be calculated on average with about $15 to $20 per square meter.
The required tools for the gravel path
To make a poured gravel path, you only need a few, simple tools:

Spirit level for alignment
Nylon cord (mason cord ) for orientation at the correct height
Laying hammer with rubber cap for setting the curbs
Shovel and spade for earthworks
Compressor for flattening the substructure
Embroidery to tension the cord
Sack trucks can also be useful for carrying the gear and materials
Step by step create a gravel path
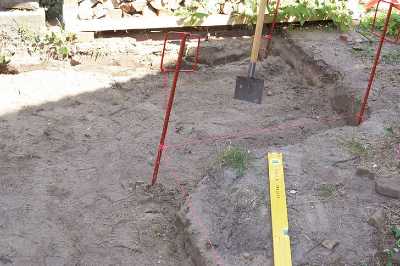
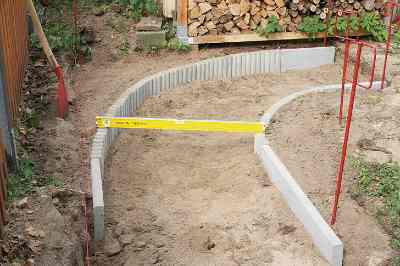
First, the shape and course of the path are marked. This can be done with straight sticking with so-called embroidery and spade or with curved shapes also with marking spray. Here, the path must be dug 10 cm wider to the left and right to set the edge stones.
Step 1/14: Hammer
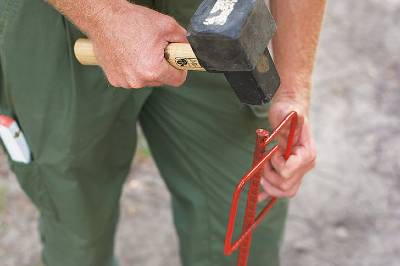
Once the course of the path is fixed and all curves are planned, the steel embroideres are hammered at the corners.
Step 2/14: Stick in
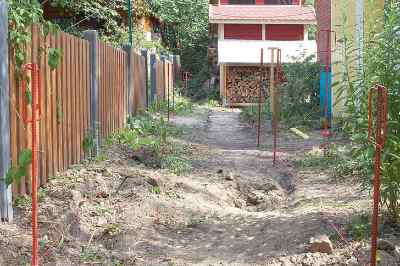
The layout for the way is taken. Now the mason’s cord can be stretched as in the drawings at the bottom right.
Step 3/14: Align to the wall
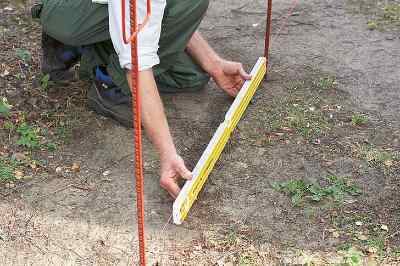
The mason’s cord is brought to the height of the upper edge of the path boundary (here lawn edge stone) by means of a water scale.
Step 4/14: Dig
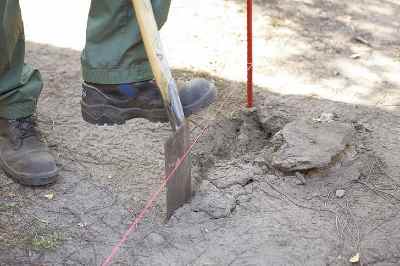
Now the ground is only sharply pierced along the tense cord with the spade.
Step 5/14: Set level
The path surface is excavated to 15 to 20 cm deep.
Step 6/14: Set a boundary
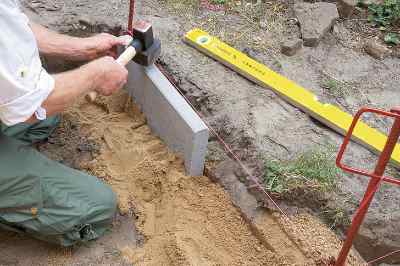
The lateral boundary is taken over by lawn edge stones, which are dug into a gravel sand bed and slammed.
Step 7/14: Check lawn edge stones
Again and again, the lawn edge stones have to be checked with a spirit level for an exact vertical orientation.
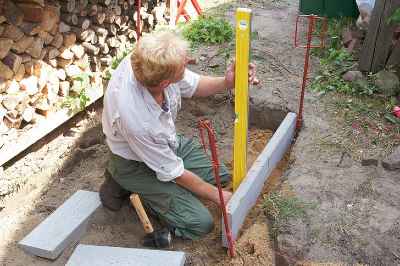
Step 8/14: Align boundary
The left path boundary edge is aligned at the height at the right (in the curve with rundpalisad) and weighed.
Step 9/14: Frost-proof gravel

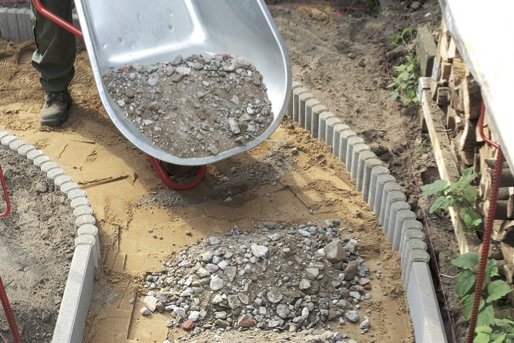
With frost-proof (antifreeze) gravel (filling sand/gravel sand) with grain size 0/32, the excavated area of the path surface is half filled.
Step 10/14: Sand tamping
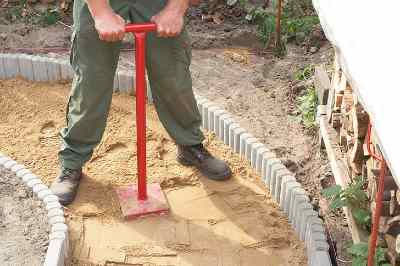
Now with a compressor, a kind of tamp with a heavy metal base plate, thoroughly tamp the sand by hand.
Step 11/14: Distribute the middle layer

As a middle layer, a mineral mixture with the grain 16/32 is distributed on the path surface about 7 to 10 cm high.
Step 12/14: Lay out the weed mat
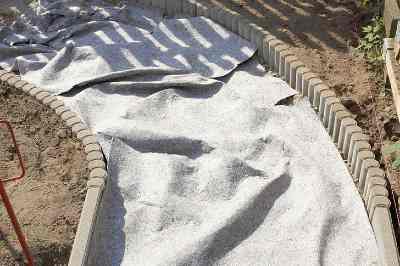
A layer of weed mat or garden fleece between the middle and upper layer prevents grass and herbs from growing from below through the gravel path.
Step 13/14: Fill in the gravel final layer
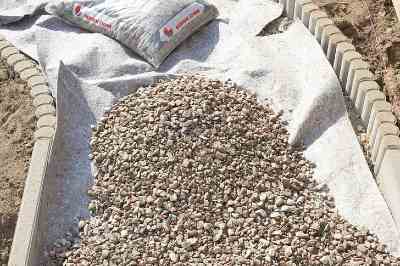
Finally, the gravel covering is filled in the appropriate colour and shape, up to slightly below the lawn stone edges.
Step 14/14: Finished gravel path
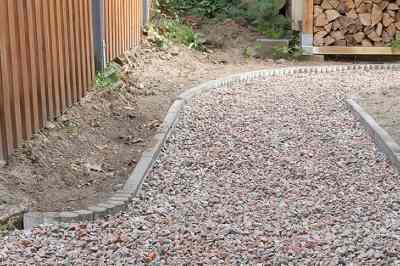
The finished gravel path looks great and also has the advantage that no puddles form on the surface, as the rainwater can flow down even in heavy rainfall.Next
This is how tension works with the cord
The nylon cord is first knotted into a loop and then pulled around the embroidery as a noose. The cord is now drawn to tension and wrapped three times from bottom to top as in the drawing around the next embroidery.
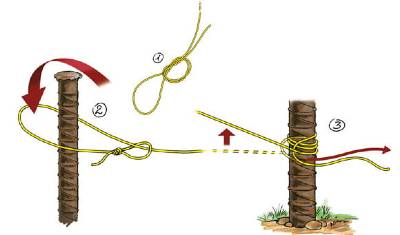
Now lift the tensioning cord with your left hand and pull the end of the cord with the right hand underneath. If you pull the left side down again, the cord is clamped by itself.
 Gerhardt Richter is a writer and a trainer at trade technical colleges, specializing in carpentry, plumbing, mechanics and construction.