
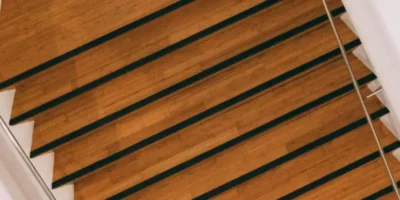


When you build in the attic, gable or loft, you often end up with sloping walls that are also a bit impractical. But that does not have to be the case! We use the space that slants and gable offer for this great idea to build storage for a sloping roof wall.
Build storage for a sloping roof wall: Straight furniture in the slant
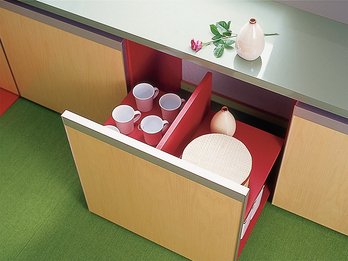
The small piece straight wall under the slant, is usually difficult to access without hitting the head. This is exactly the basis of our first idea: We not only built a precisely tailored sideboard under the slant, we equipped it with suitable trolleys.
They have an invaluable advantage over doors: you can pull them out to the point where you can stand up next to them without endangering your head. Or you can also pull the trolley to the table to have handicraft or office supplies at hand.
Building storage in a sloping roof: This is how it works
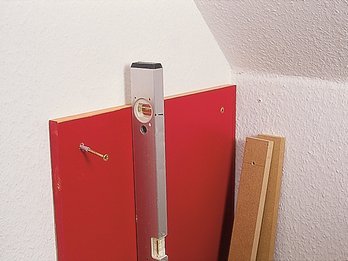
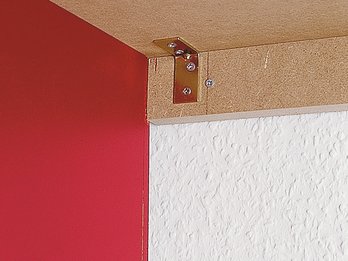
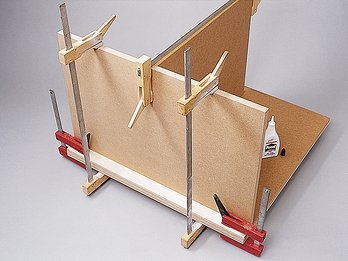
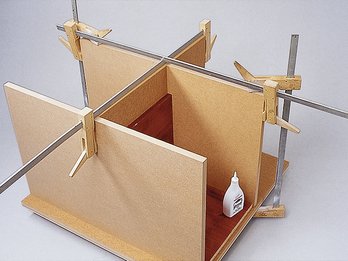
The two elements to build storage for a sloping roof, sideboard and shelf trolley, are made of 19 mm MDF panels. The mounting principle of the board works in such a way that only the first side wall, the spacers and the stop bar are firmly smothered to the wall and floor. The remaining side walls are held only by the dodging strips and the top plate.
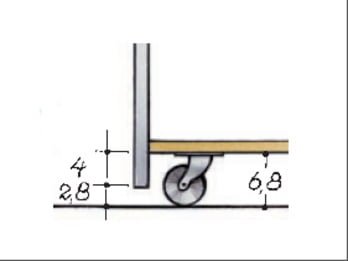
The light width of the “garages” depends on the width of the trolleys and their front panel. Measure them so that the latter hit the side walls on both sides on 2 mm (in our case: clear width 69.6 cm, front panel width 70 cm). The depth and height of the trolleys depend on your sloping roof, generally the flatter the slope, the deeper the carriages. But be careful: If the car becomes too high in relation to the length, it no longer rolls, but tilts slightly forward.
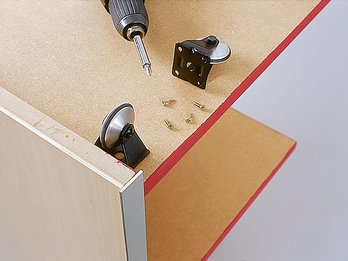
Speaking of wheels: If you use rigid buck wheels instead of steering wheels, then the cars are easier to move in the garage. Treat the surface of the MDF panels with a synthetic resin-based paint. It is more resistant to scratches than an acrylic lacquer. The glued-on veneer plate made of maple is finely sanded once (180 grain) before treating it with clear varnish. If you choose to integrate sockets into the vertical aperture, you should focus on can mounting and laying the cables. The power connection itself is a matter for the expert!
Details
Build sloping shelf: sketches and dimensions
The sideboard in our project to build storage for a sloping roof consists of MDF panels, which you can cut to measure in the DIY store. You have to make the miter cut on the vertical aperture yourself, as well as the groin cut below 10 cm width – this is rejected by most DIY stores for safety reasons.
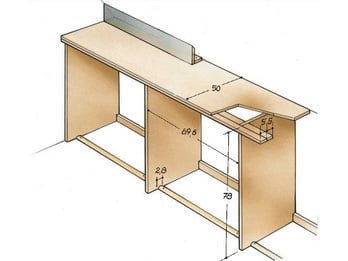
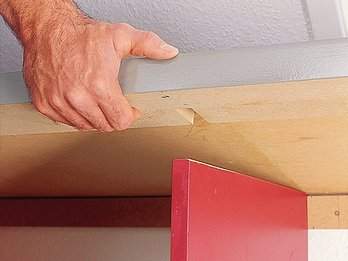
The front panel consists of a 19 mm MDF plate on which a 5 mm thick veneer plate is glued onto. The edges of aluminium profiles are slightly wider than the front panel is thick. Remove the supernaging of 6 mm.
The height of the base plate depends on the installation height of the buck rollers used. The front panel should be 2 to 3 cm away from the ground.
Building storage under sloping roof wall: Instructions
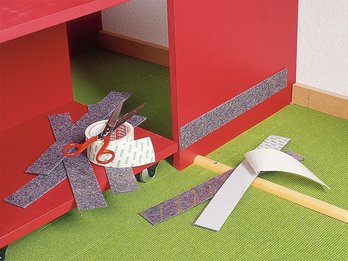
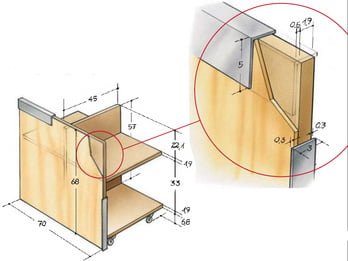
A suitable semi-circular strip, about 5 cm behind the front edge in the ground, is an extension stop for the shelf trolleys. At the height of the two floors of the trolley, you should stick felt strips on the side walls so that no scratches remain in the paint by pushing back and forth.
Trolleys on wheels or castors: Instructions
 Gerhardt Richter is a writer and a trainer at trade technical colleges, specializing in carpentry, plumbing, mechanics and construction.